A Murloc's Concise Handbook of Quest and Narrative Design, Part III
Really, this is as much a chat about my feelings on Phantom Liberty as it is about quests.
Reposted from my article on Gcores, so I have a copy on my own blog.
Preface
First, sorry for disappearing for so long. The new job hasn’t exactly been a happy experience. I had plenty more I wanted to share, but after all the running around, I couldn’t bring myself to write any of it.
Still, I’ve finally managed to get a little time off. We can at last talk about the more “subjective” side of narrative and quest design: the experience and judgment that give your work its particular style.
This time, I’ll use a few sequences from Phantom Liberty, the expansion for Cyberpunk 2077. Think of it as a look at how CDPR worked within 2077’s existing framework to build a DLC whose quests feel somewhat different from those in the base game.
Intro: Welcome to a new kind of tension
The structure and challenges of a spy film

Interview subtitles, translated from the screenshot: “The variety of quest choices will take a different form. As you know, PL’s main atmosphere is that of a spy thriller. Compared with the original, interacting with NPCs will place more emphasis on whether your cover might be blown and whether you should work for this person. That sort of… Bourne feeling. But PL is still an expansion for 2077, so its overall style stays close to the original. We won’t have quests that feel completely detached from it, right? We need consistency. We’ve prepared a lot for you, and we’re very much looking forward to hearing what you think.”
If you remember the wall-to-wall publicity before Phantom Liberty came out, you’ll remember one phrase CDPR kept repeating: “spy thriller.”
Now go back and lay out the player’s route into Dogtown. Its structure is remarkably close to a spy-film sequence that’s been stretched out.
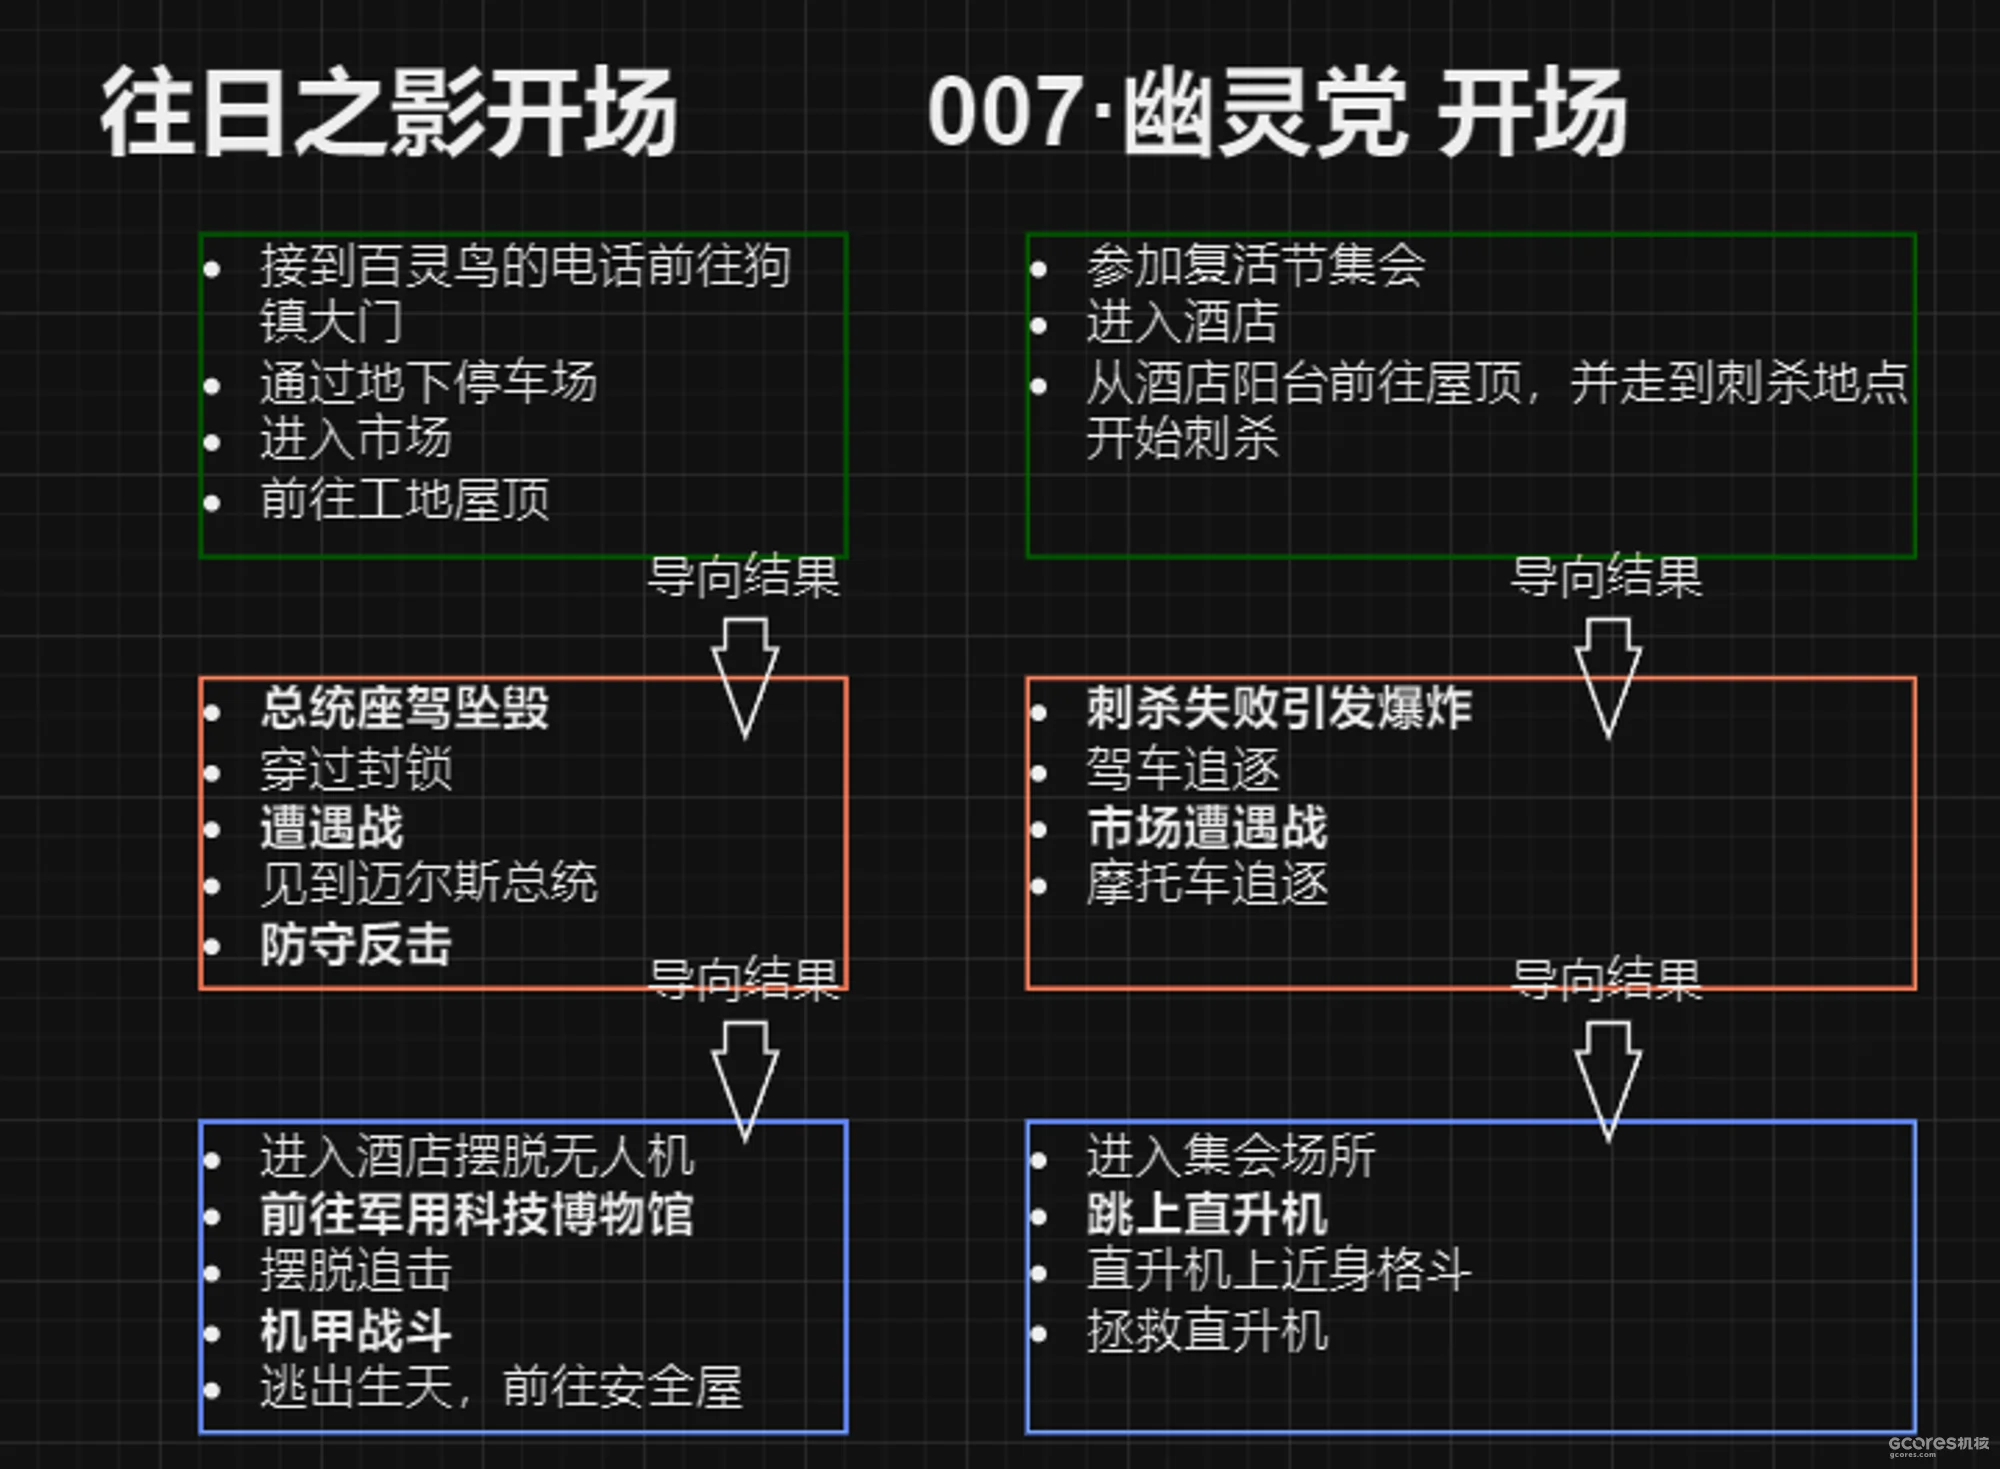
The opening sequences, side by side. Each group leads into the next:
| Stage | Phantom Liberty | Spectre |
|---|---|---|
| Approach | Receive Songbird’s call and go to Dogtown’s gate → cross the underground car park → enter the market → reach the construction-site rooftop. | Join the “Easter” gathering1 → enter the hotel → move from the balcony onto the rooftops and into position for the assassination. |
| Escalation | The president’s aircraft crashes → cross the blockade → fight through an encounter → find President Myers → defend the position and counterattack. | The assassination goes wrong and causes an explosion → car chase → market encounter → motorcycle chase. |
| Climax and escape | Enter the hotel and evade the drone → head to the Militech museum → shake off pursuit → fight the mech → escape and reach the safehouse. | Enter the festival grounds → jump onto the helicopter → fight at close quarters inside it → regain control of the helicopter. |
OK. We can boil that pattern down to a fairly simple framework:

Establish a goal → blend into the surroundings → encounter the known target → solve the problem → a sudden change → face a challenge → solve the problem → blend back into the surroundings and disappear.
Expand that framework for this intro, and we get this:
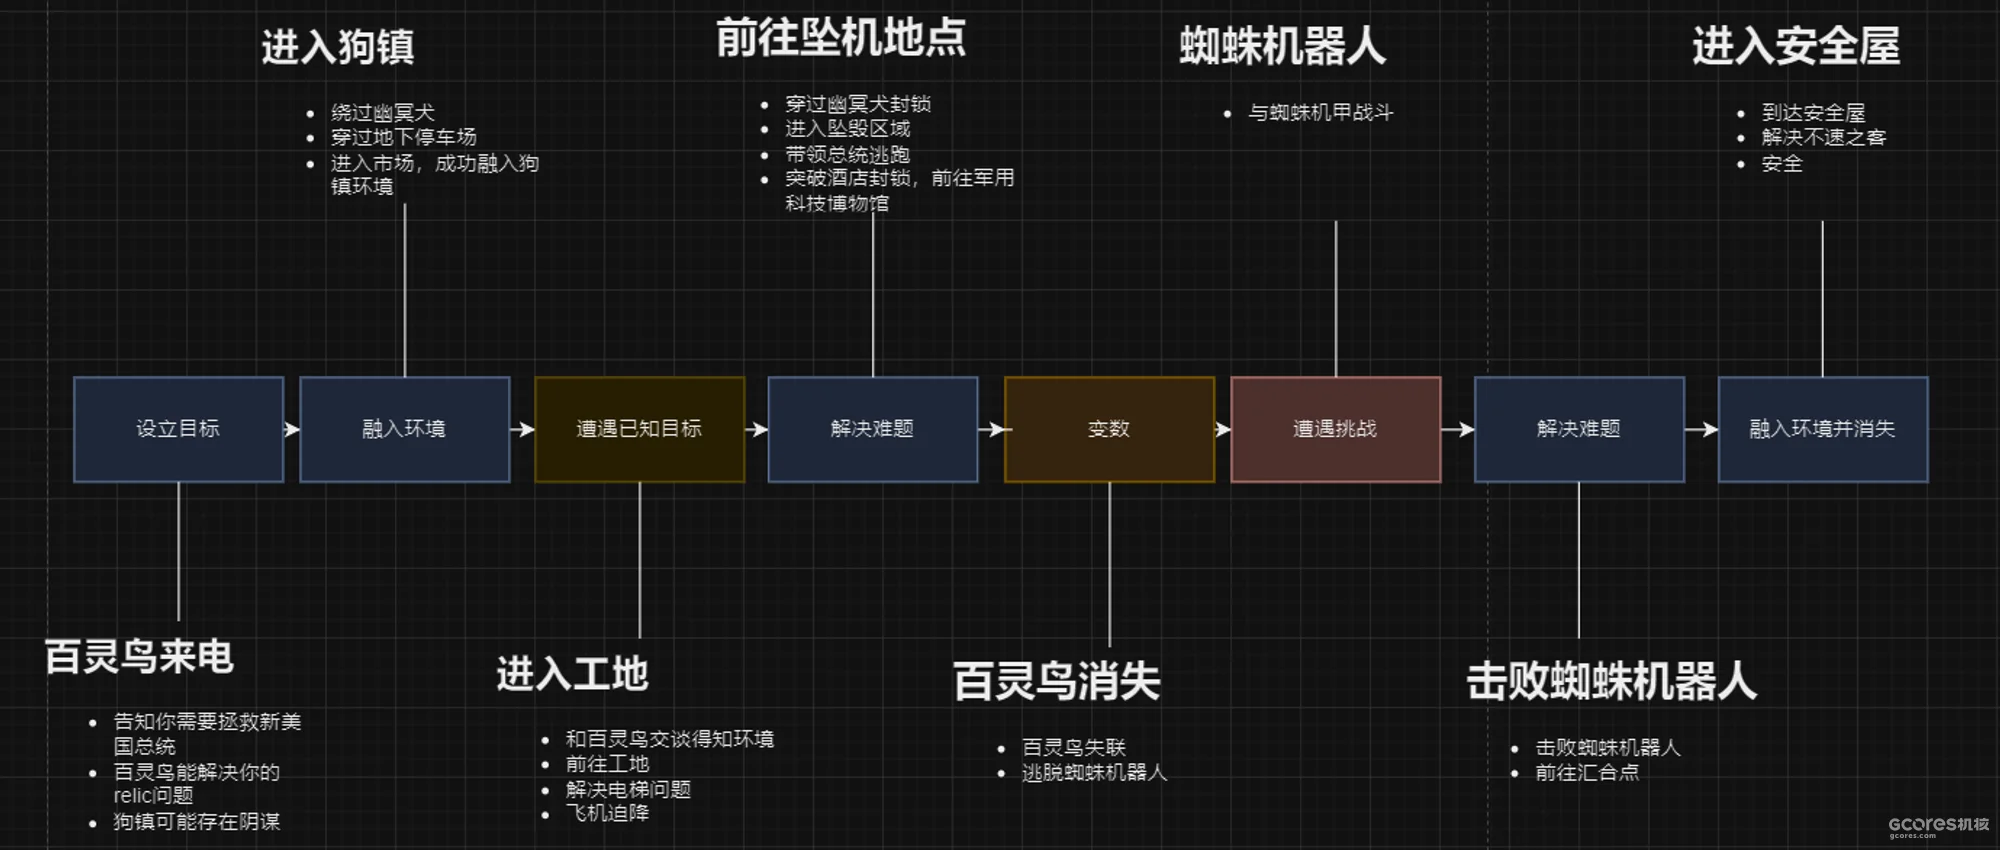
- Songbird calls — establish a goal. She tells you to save the NUSA president; she can solve your Relic problem; something may be going on in Dogtown.
- Enter Dogtown — blend into the surroundings. Get around Barghest, cross the underground car park, enter the market, and become part of Dogtown’s environment.
- Enter the construction site — encounter the known target. Talk to Songbird and learn about the situation, reach the site, deal with the elevator, and witness the aircraft coming down.
- Reach the crash site — solve the problem. Cross Barghest’s blockade, enter the wreckage, escape with the president, break through the hotel blockade, and head to the Militech museum.
- Songbird disappears — a sudden change. Lose contact with her and flee the spider robot.
- The spider robot — face a challenge. Fight it.
- Defeat the spider robot — solve the problem. Bring it down and head to the rendezvous.
- Enter the safehouse — blend in and disappear. Reach the safehouse, deal with the unexpected visitors, and get to safety.
Across that sequence, the player’s challenges are roughly:
- Get past the blockade into Dogtown.
- After the aircraft comes down, cross Barghest’s cordon.
- Fight at the crash site.
- Break through the hotel blockade: the drone and the Barghest troops in the lobby.
- With Songbird gone, escape the spider robot.
- Fight the spider robot.
- Deal with the unexpected visitors at the safehouse.
If you remember the “rational level design / dynamic design” curve from my earlier handbook, you’ll see why this intro makes such a good example of interleaving the rises and falls of an RLD curve.
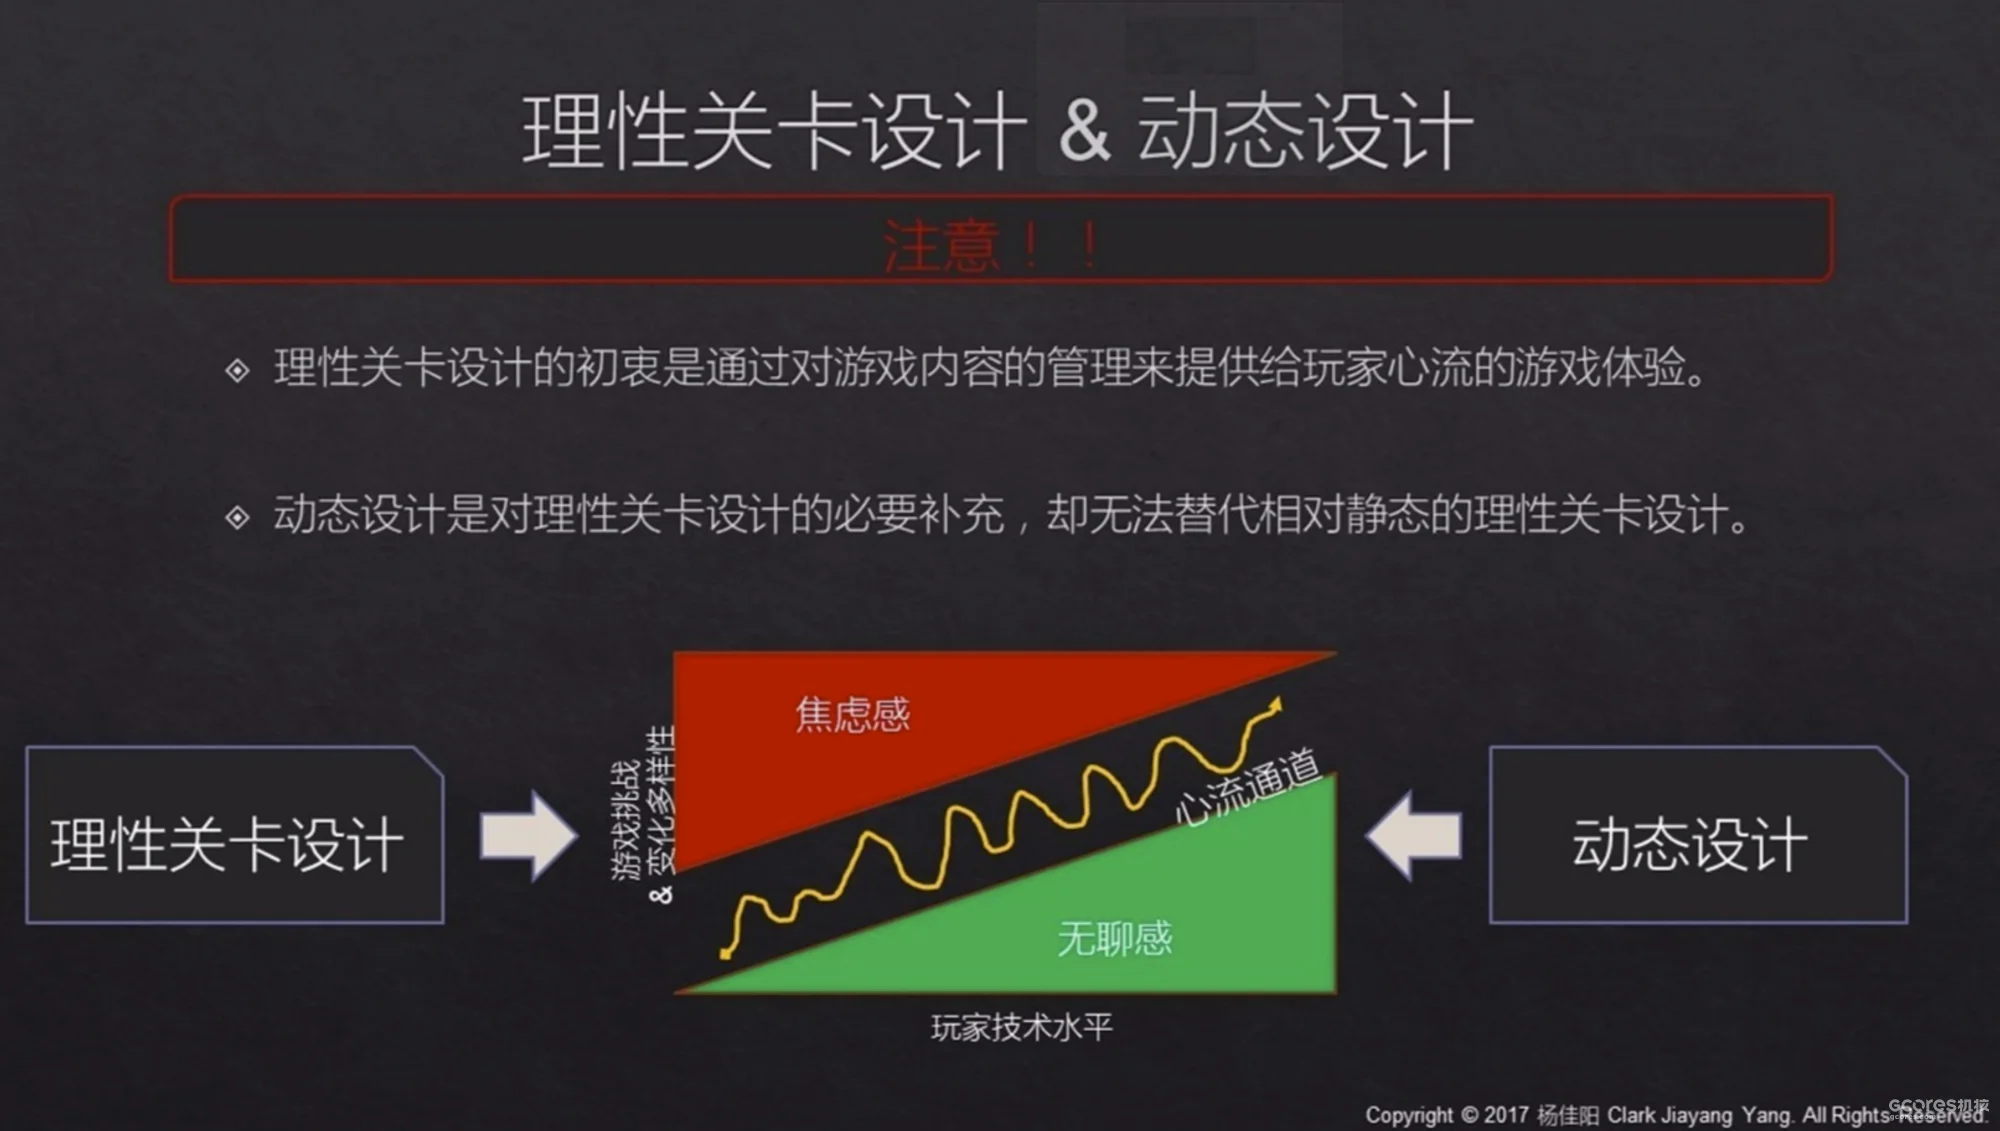
Rational Level Design & Dynamic Design — a reminder from Clark Jiayang Yang’s 2017 slide:
- Rational level design aims to manage game content so that players can experience flow.
- Dynamic design is a necessary supplement to the comparatively static structure of rational level design; it cannot replace it.
- The horizontal axis is player skill. The vertical axis is challenge and variety. The flow channel runs between anxiety above and boredom below, with a rising, fluctuating line inside it.
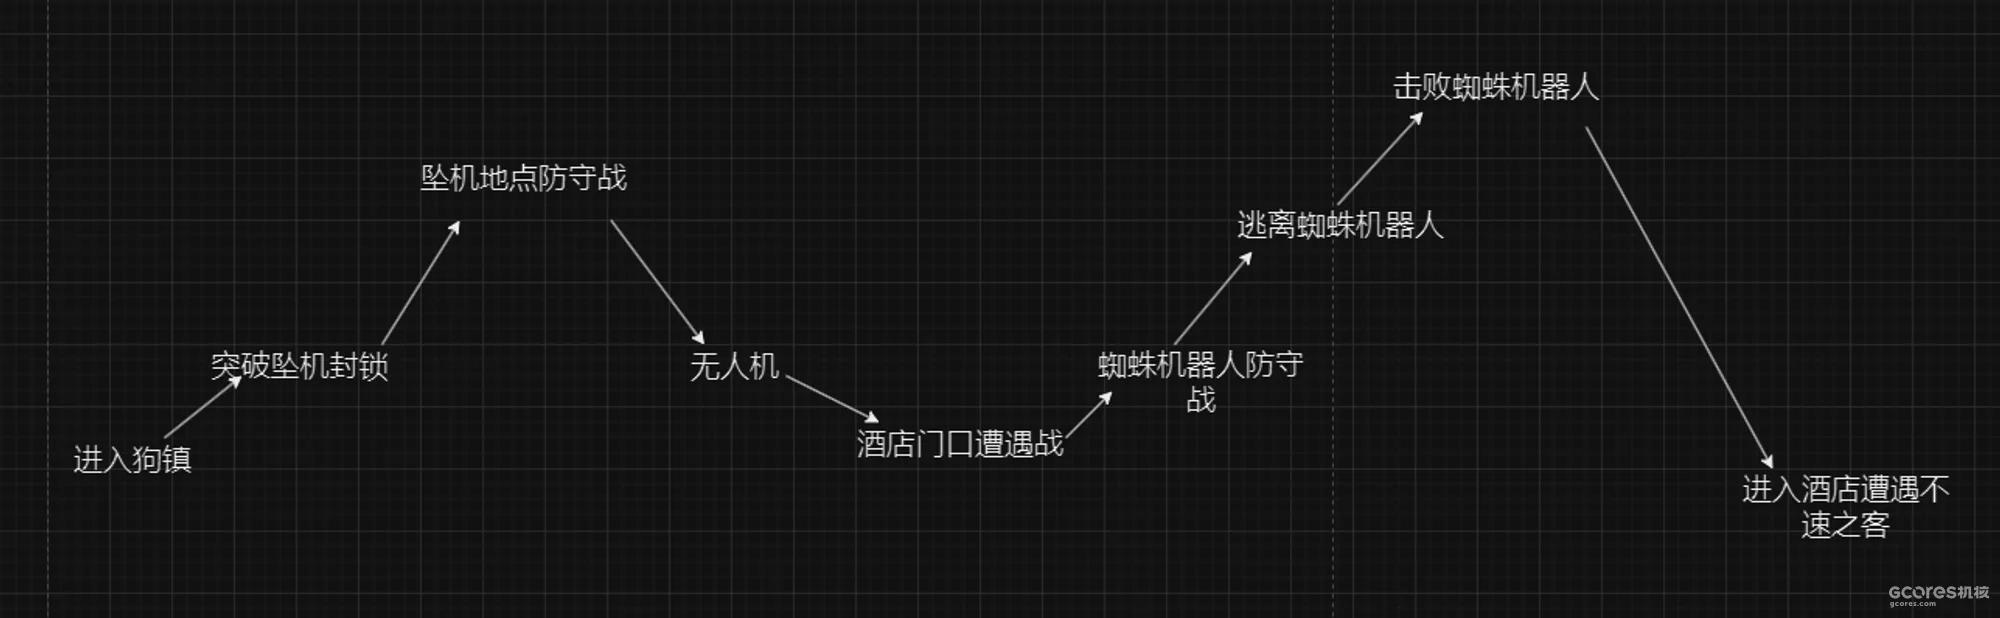
The challenge curve, in order: enter Dogtown → break through the crash-site blockade → defend the crash site (first peak) → the drone → the encounter at the hotel entrance (a trough) → the spider-robot defensive encounter → escape the spider robot → defeat it (the highest peak) → enter the hotel and face the unexpected visitors (release).
Now include the intro’s presentation and staged scenes, and the rhythm becomes even clearer.
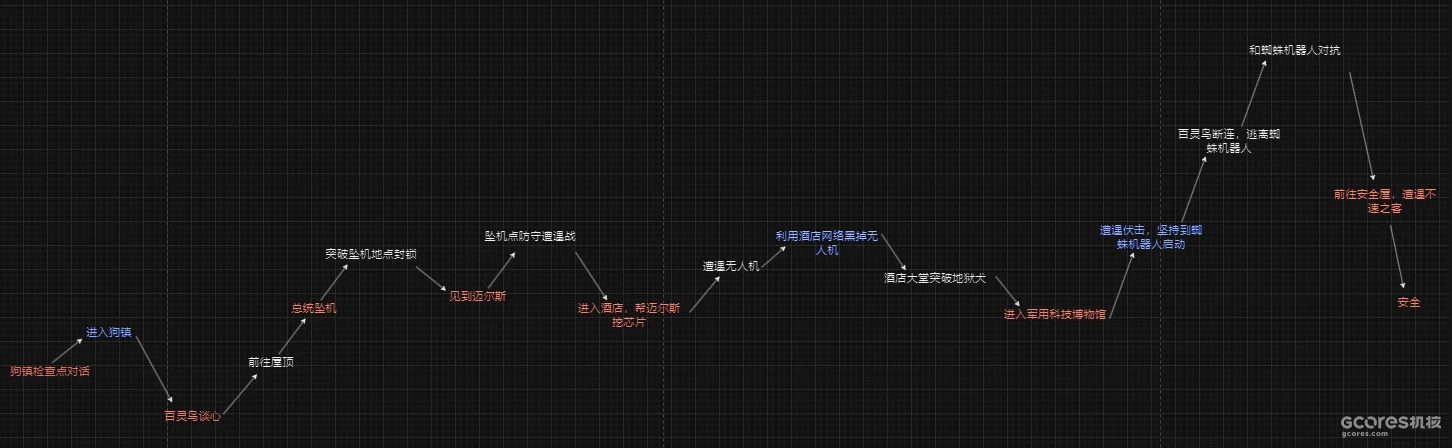
The expanded curve:
- Talk at the Dogtown checkpoint → enter Dogtown → have a heart-to-heart with Songbird.
- Reach the rooftop → the president’s aircraft crashes → break through the crash-site cordon → meet Myers → defend the crash site.
- Enter the hotel and help Myers remove the chip → encounter the drone → use the hotel’s network equipment to deal with it → fight through Barghest in the lobby → enter the Militech museum.
- Face an ambush and hold out until the spider robot activates → lose contact with Songbird and flee the robot → fight it → head to the safehouse and meet the unexpected visitors → safety.
The chart places conversations and staged events along the same rising and falling line as traversal and combat. These are qualitative comparisons of intensity, not numerical measurements.
How to deliver exposition “elegantly”
Right. We’ve taken a fairly blunt instrument to Phantom Liberty‘s RLD curve. Now let’s go back to the comparison with spy films.
Most spy films take place in the real world. And even when they don’t, real-world physics and common sense can still, at least a little… constrain and explain what happens on screen.
2077, though, very obviously takes place in a fictional world. The NUSA, Songbird, Dogtown: none of these can be explained away in a couple of sentences. Yet as an “agent,” the player really does need to understand the people and events of this place before embarking on Dogtown’s Bizarre Adventure.
So how does Phantom Liberty get that exposition across “elegantly” in its intro?
How do you get to know Songbird quickly?
The DLC adds a Relic perk tree. As a new branch of abilities, it needs at least a halfway plausible explanation within the fiction.
Meanwhile, your dear colleague the writer hands you a character brief for Comrade Songbird. You skim it. Hmm… NUSA intelligence analyst, ridiculously good hacker, has crossed the Blackwall and made contact with AIs, red… Hang on. You’re sure you didn’t just write Alt again?
And then a question hits you: how do I get the player to form an impression of Songbird, quickly, during the intro?
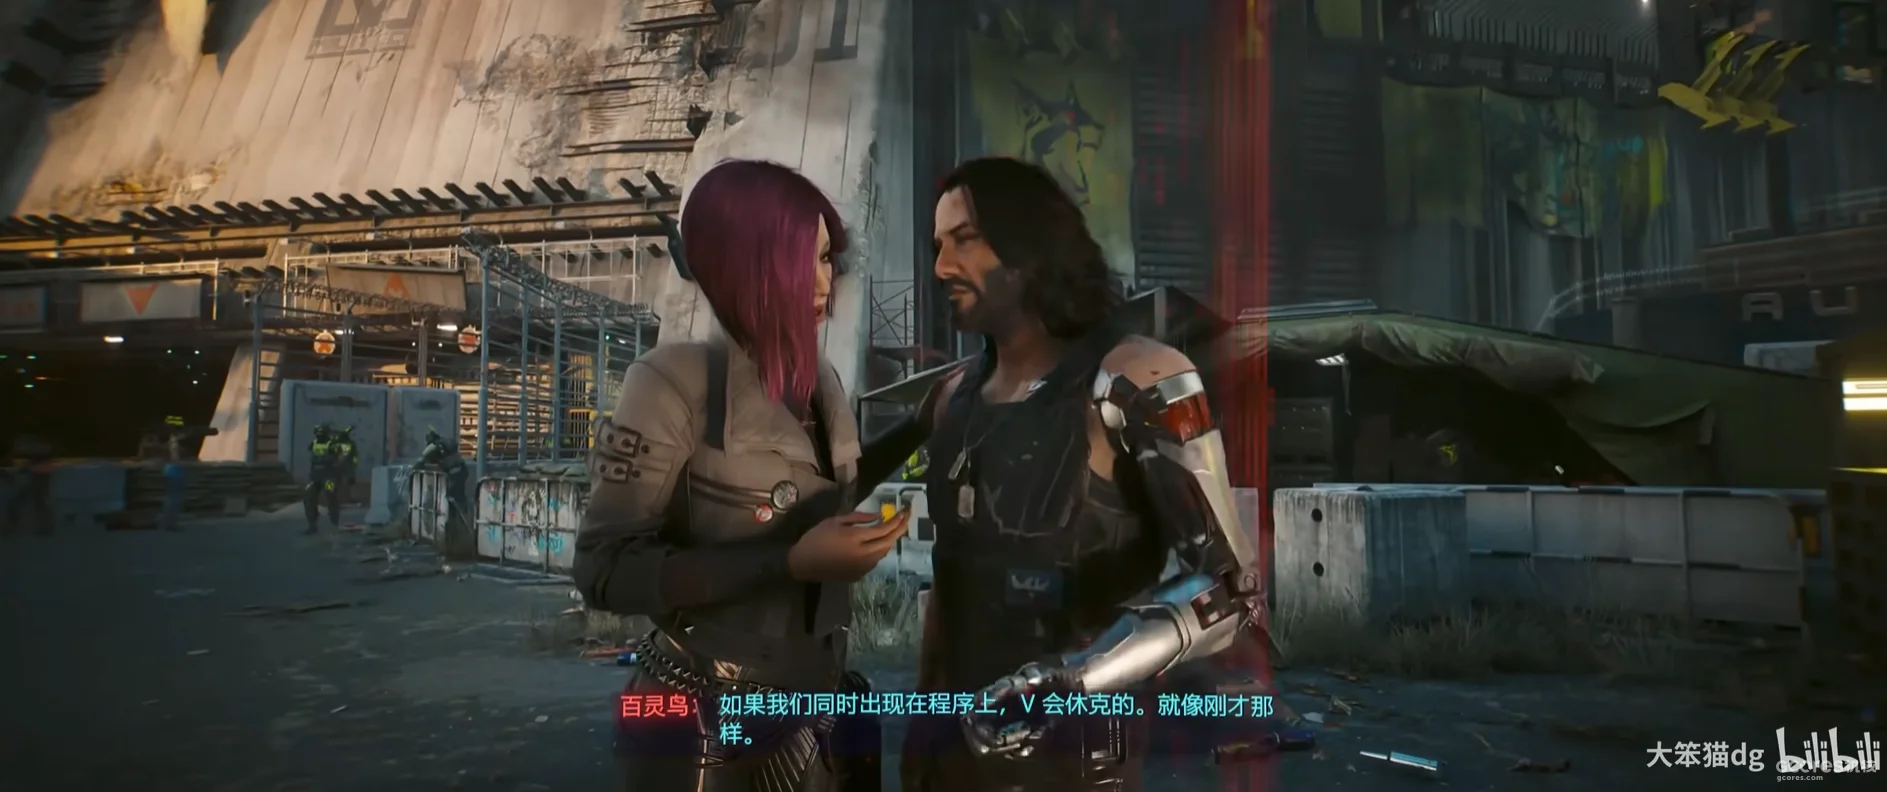
Songbird’s subtitle, translated from the screenshot: “If we’re both running in the program at once, V goes into shock. Like just now.”
CDPR’s answer is that Songbird can hack the Relic and unlock the options for upgrading its abilities.
And how do they stage that? Songbird boots Johnny straight offline. She takes control of the Relic.
Johnny: “Tell her you’ve got a guardian angel.”
That still isn’t quite enough. These days, practically every NPC comes with the “multitalented” perk. So, in the car-park sequence that follows, CDPR’s designers place plenty of hints about Songbird in the environment itself.
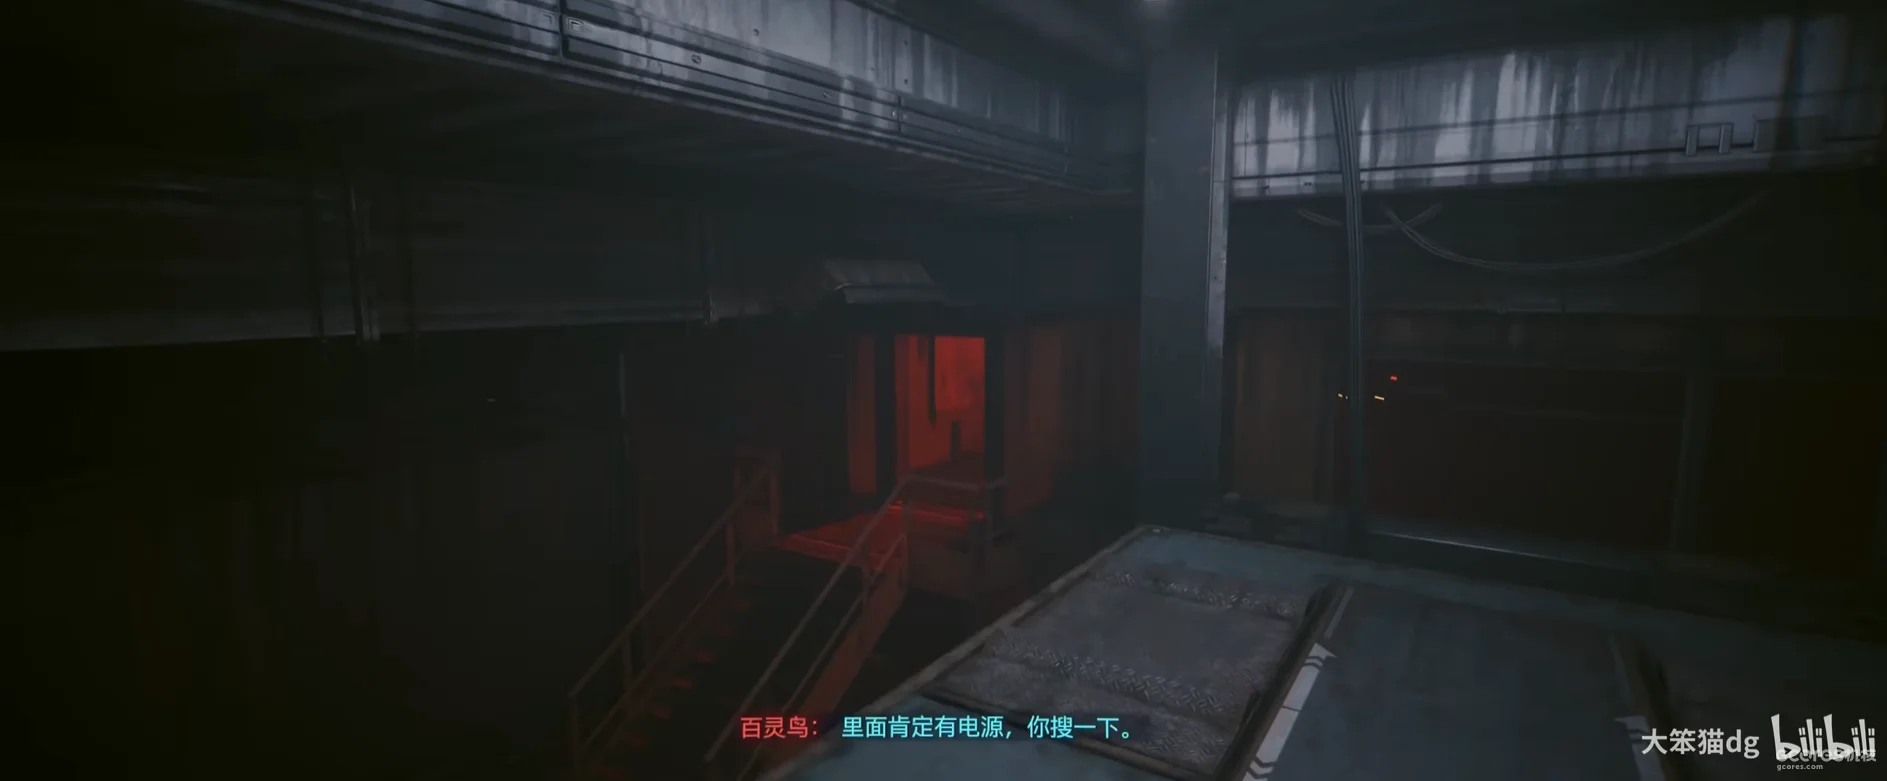
Songbird: “There must be a power source in there. Have a look.”
When the player first enters the underground car park, the camera guides their eyes toward the exit from this space: a room lit in red.
The player enters that red room, finds the power supply, and switches it on. The red light goes out. In its place, a red path outside leads onward into the car park.
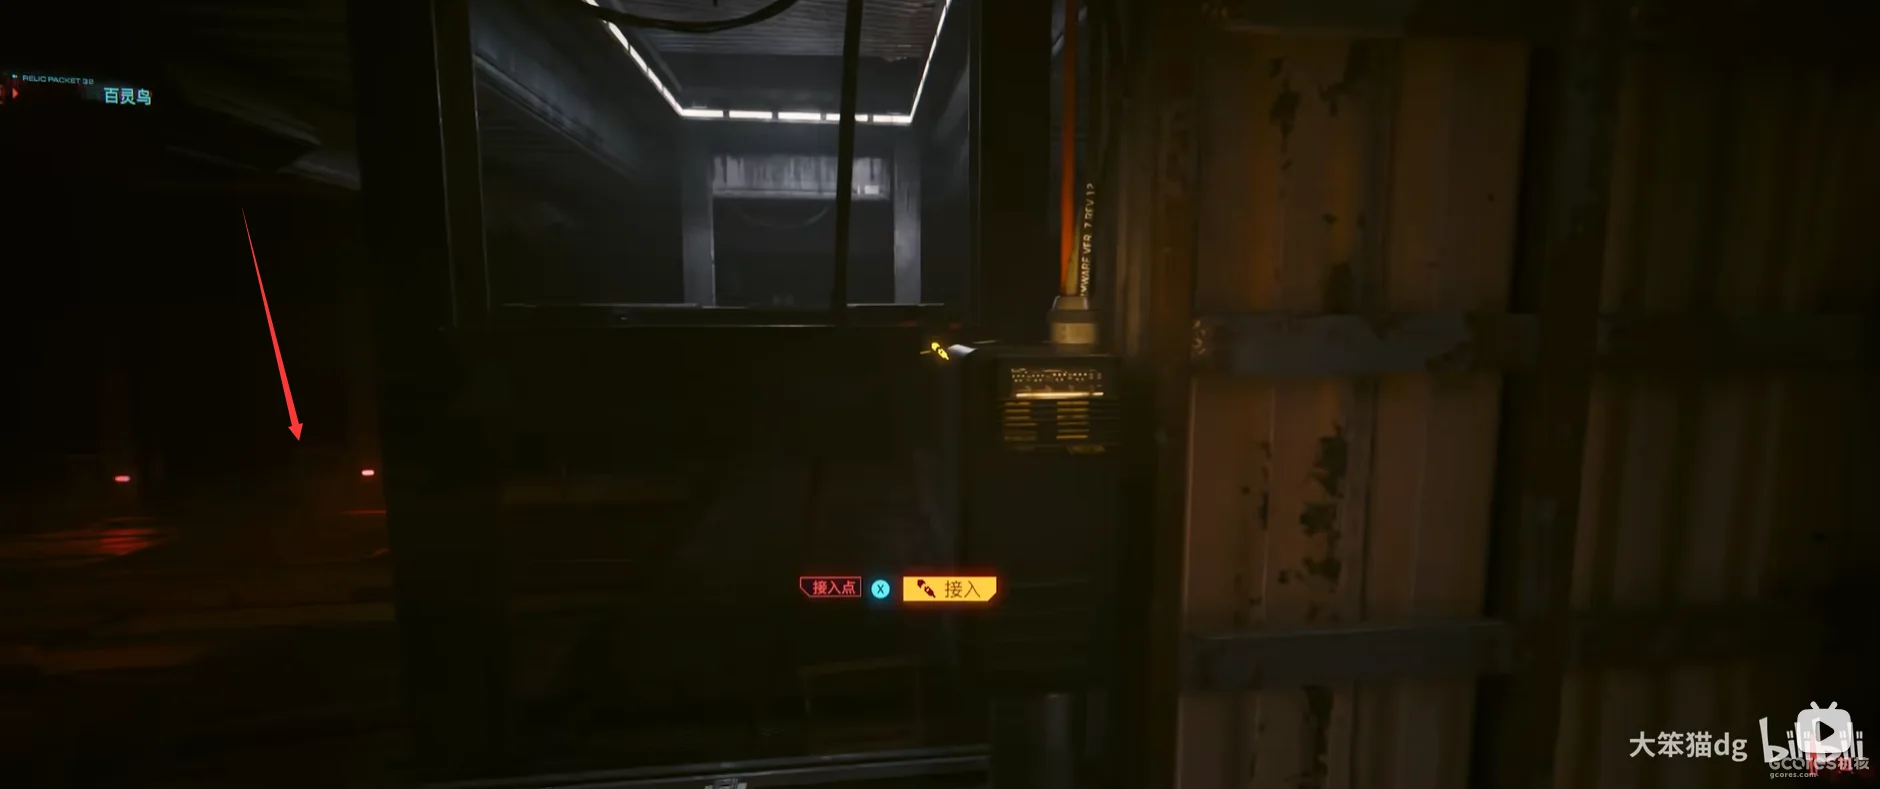
The arrow marks the red route outside; the interaction prompt is an access point for connecting to the system.
Once you connect Songbird to the building and step onto the conveyor, red becomes the scene’s dominant color again.
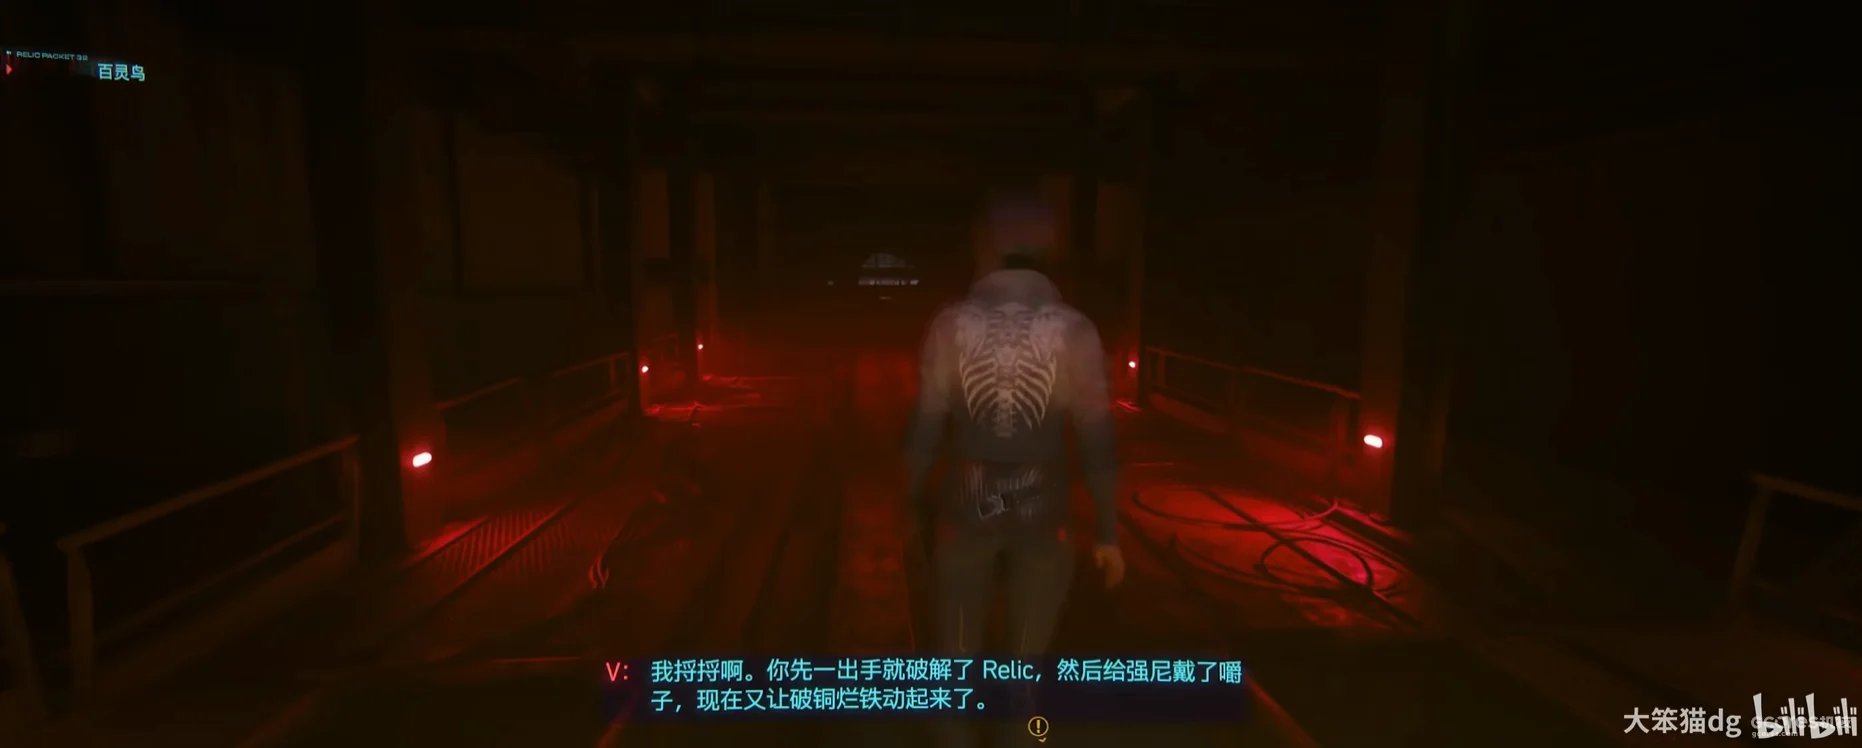
V counts off what she’s done: cracked the Relic, muzzled Johnny, and now got this pile of scrap moving.
For the rest of the sequence, whenever Songbird activates a mechanism or opens up an electronic device for you, you see that red digital effect.
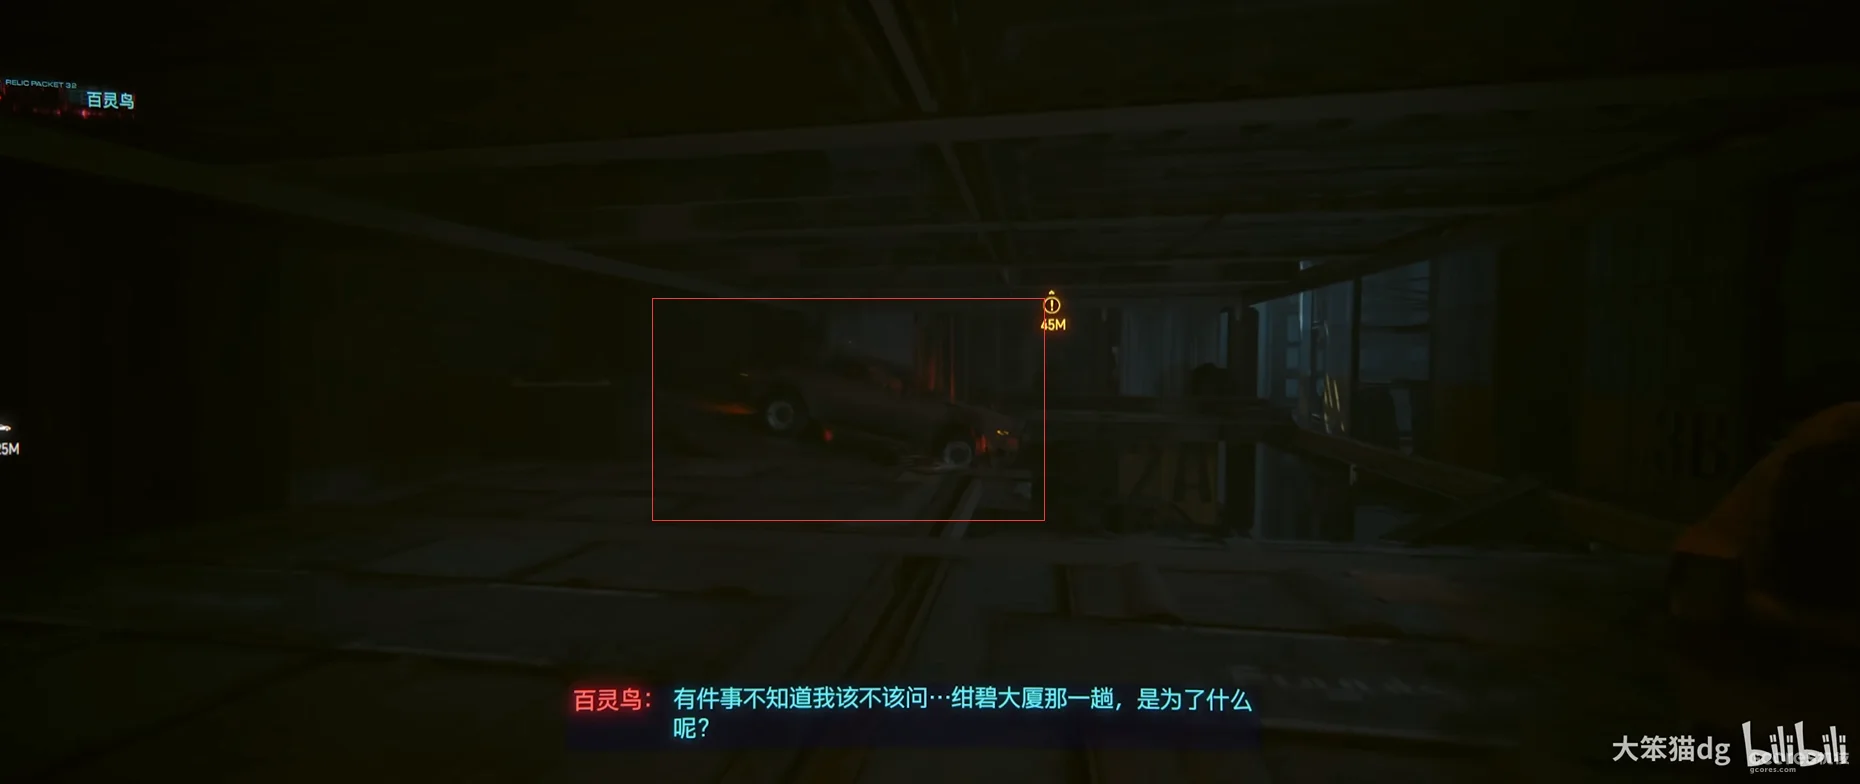
The highlighted mechanism carries the red effect. In the subtitle, Songbird asks what the Konpeki Plaza job was about.
The effect changes as the mechanism activates. When the red effect reaches its strongest point, the mechanism finishes starting up.
At one point, V loses their footing and falls. The camera script looks upward, and the route to the destination is still marked out in red light.
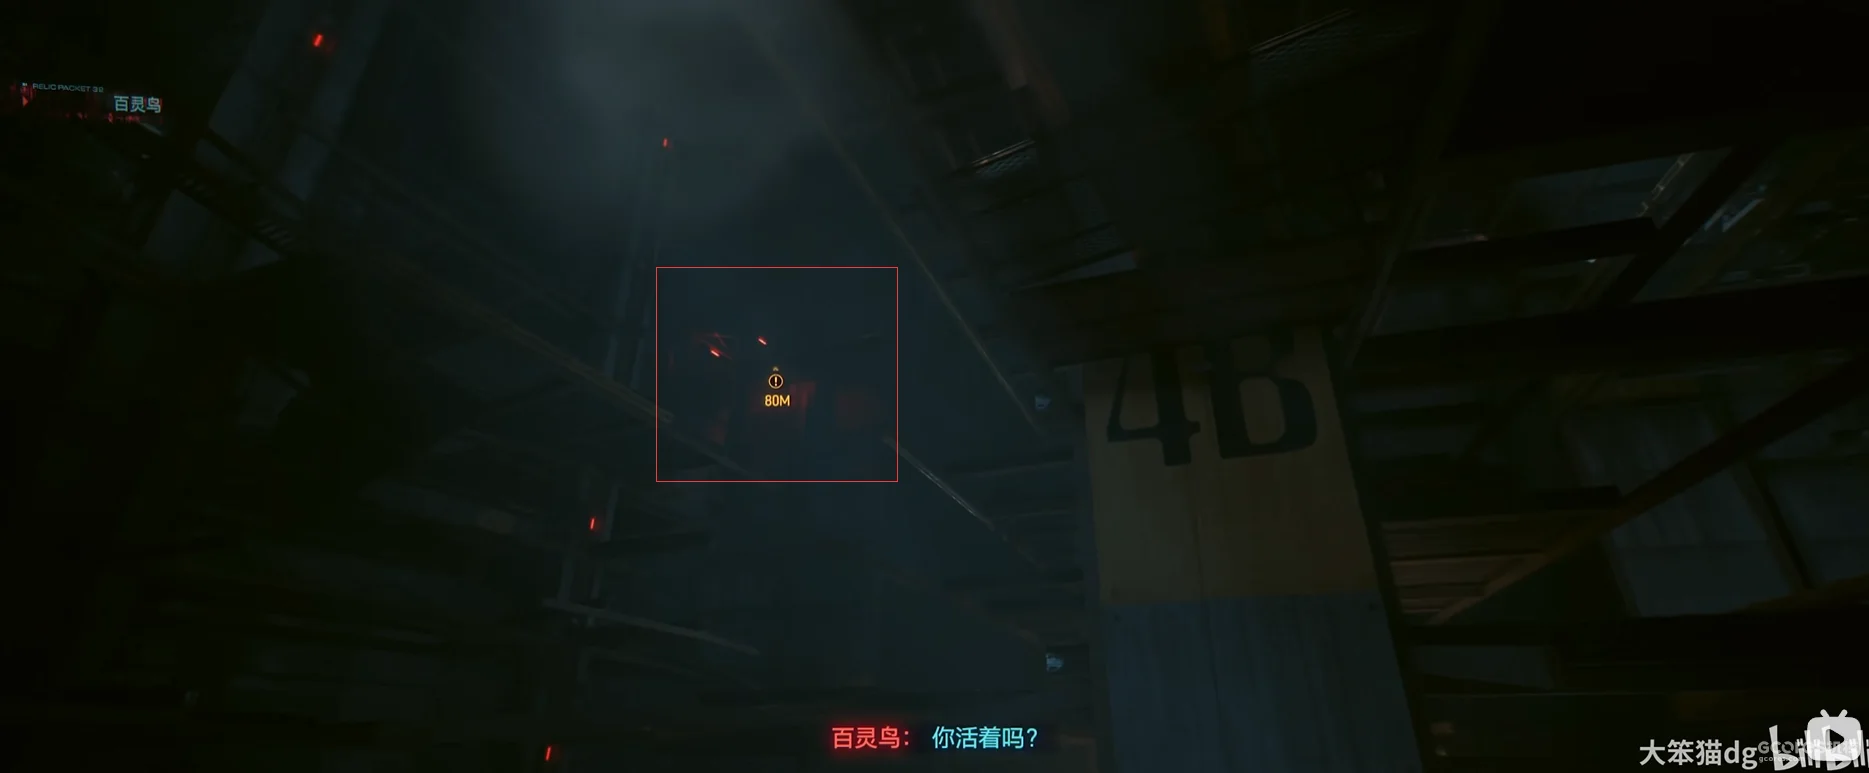
Songbird: “You alive?” The highlighted red lights mark the way onward above V.
So in this sequence, “red” stands for Songbird. It also stands for the destination, and for safety.
That makes it easy to believe, “Songbird is guiding me through this underground car park.” And considering that her actual body is on a spaceplane, waiting to go splat alongside the president, the idea of her as an extraordinarily powerful hacker settles very quickly into the player’s impression of her.
Even though you barely spend any time with Songbird over the entire DLC. (Yeah, right.)
Barghest’s encounter composition
OK. Let’s turn back to the intro’s other star: John—pfft, no. Barghest.
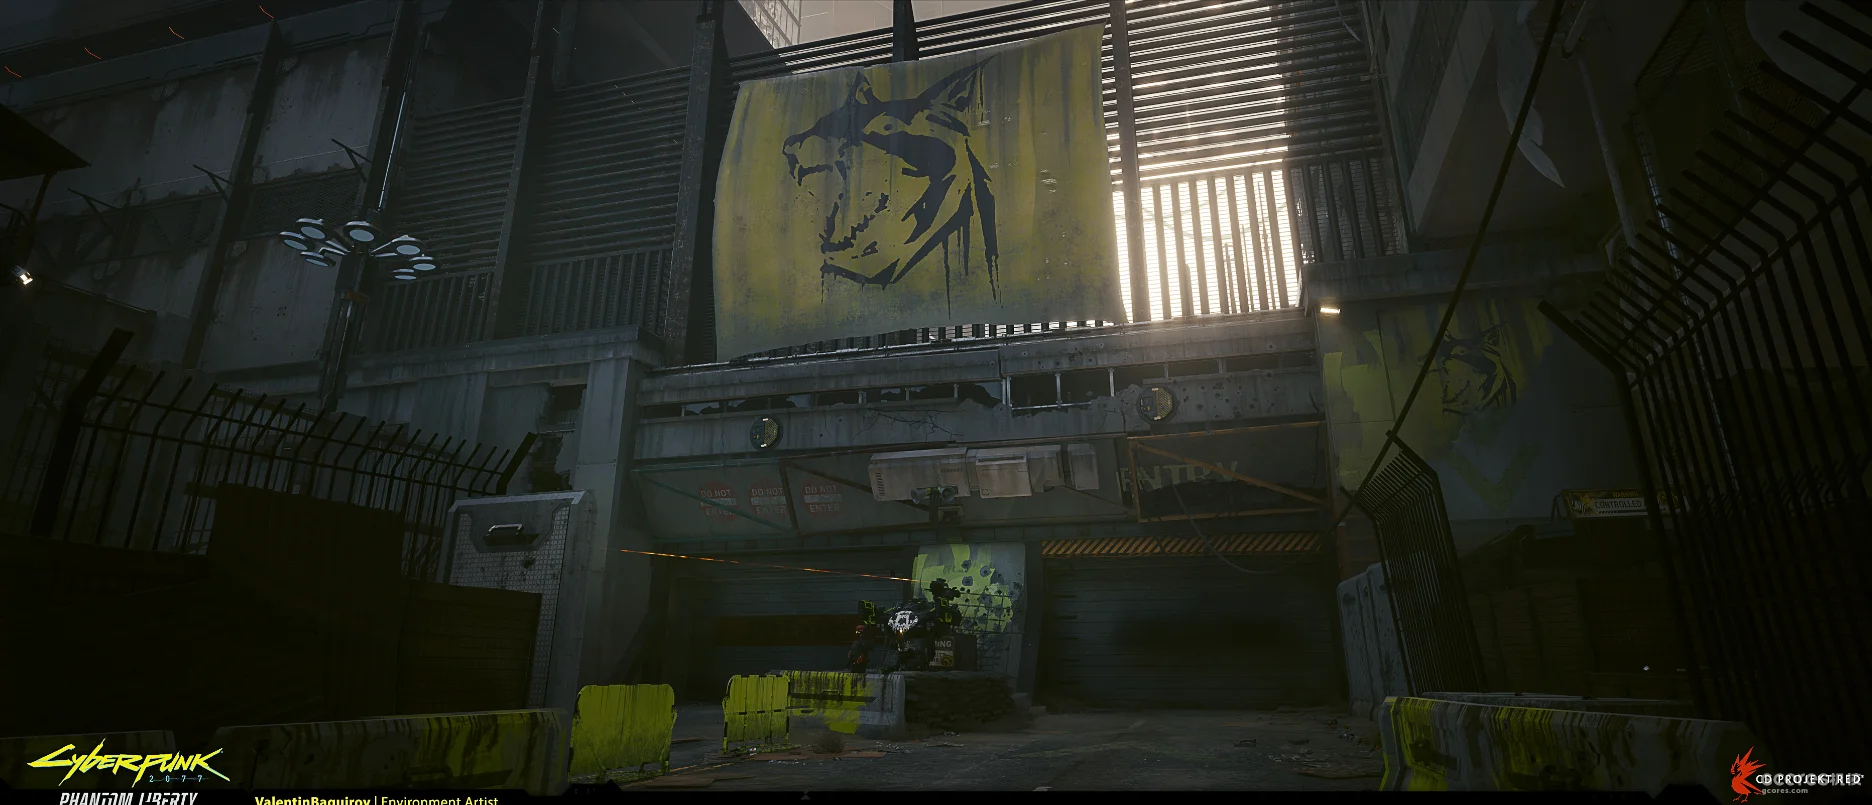
Strictly speaking, as a force that stands above the NCPD in this game (lol), Barghest tends to read as a military force. Its clothing may have a strong street-graffiti look, but CDPR consistently deploys its enemies as organized units. A wave of Barghest reinforcements usually contains several enemy types with different roles. Where each one appears and how it attacks give the group a strong sense of being a squad.
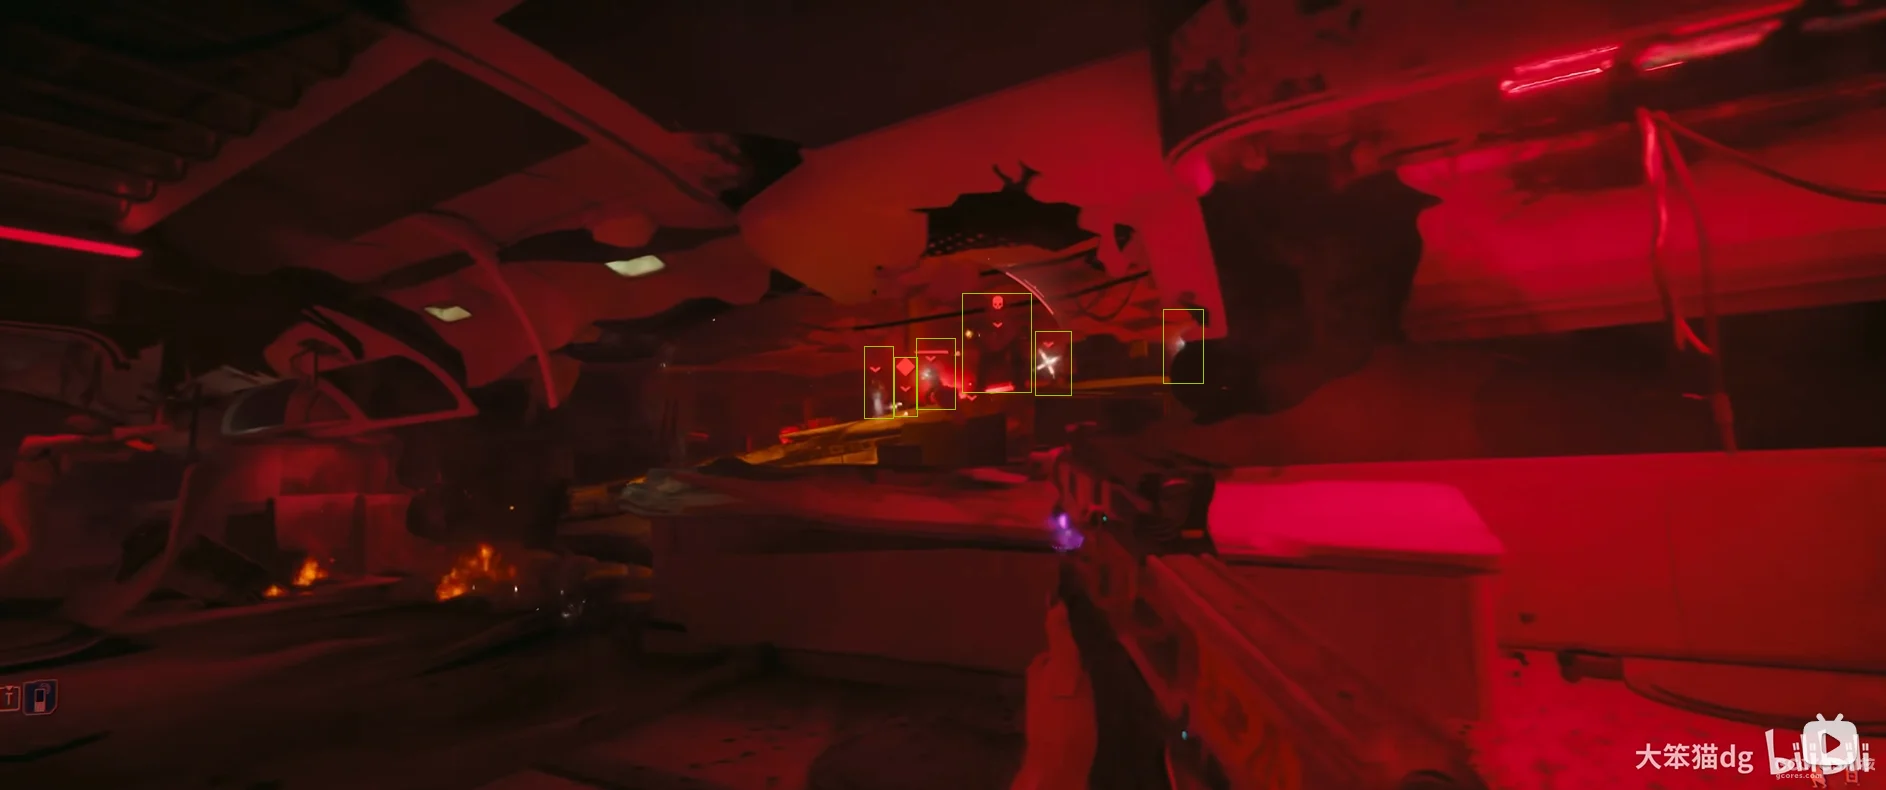
Even at the Dogtown checkpoint, you can see a similar composition: turret or robot + elite + ranged grunts + melee grunts. Higher difficulties add more grunts.
Honestly, the numbers already put fairly heavy pressure on the player throughout the DLC on Normal and Hard. Yet CDPR sticks to this squad-based composition. It feels a little like Halo‘s Covenant squads: one Sangheili, or Elite, accompanied by a few Grunts and Jackals.
Compare that with “spawn two big mechs outside the plane after the player meets Myers, then spawn a squad of mooks once those are dead.” Deploying organized units can meet the design requirements while also making Barghest more convincing as Dogtown’s military force.
Path 2: Yesterday Once More
OK. Having talked about the intro, I’d like to move on to another much-discussed part of this DLC: its side quests and gigs. Since this is about quest and narrative design, I won’t get into how good the scripts are for now. I’m more interested in mechanisms such as quest structure and how branches are triggered.
Quest structure
Take “Dogtown Saints” and break down its structure. We get something like this:
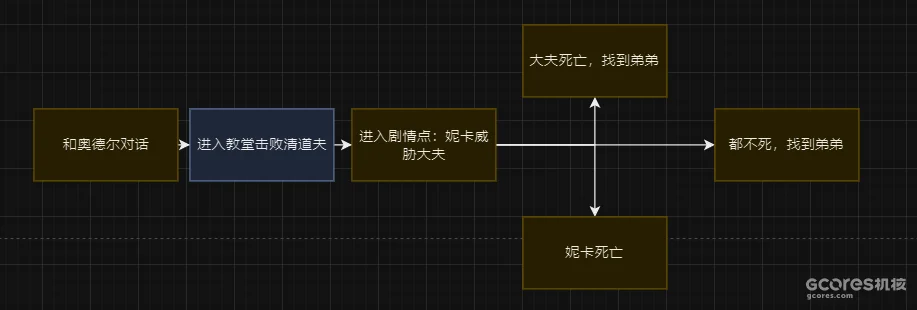
Talk to Odell → enter the church and defeat the Scavs → reach the story beat where Nika threatens the doctor. From there, the chart shows three outcomes: the doctor dies and Nika finds her younger brother; neither dies and she finds her younger brother; or Nika dies.
The same structure applies to gigs such as “Treating Symptoms” and “The Man Who Killed Jason Foreman.”
Reduce it to its essentials and we get this:
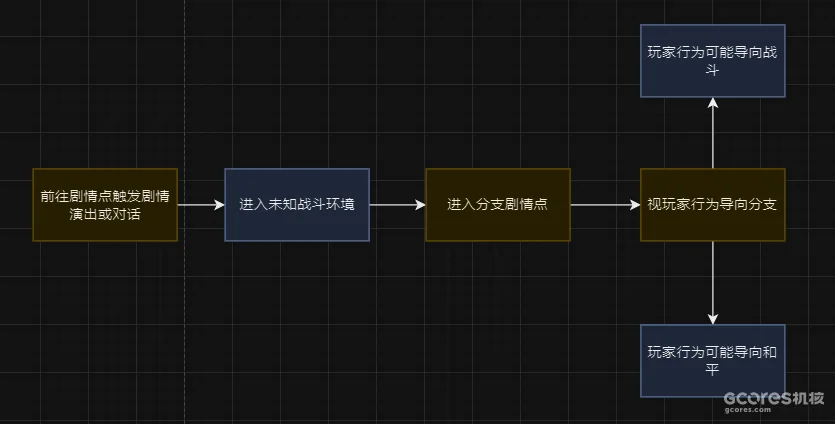
Go to a story location and trigger a scene or conversation → enter an unfamiliar combat space → reach a branching story beat → branch according to the player’s behavior, potentially into combat or a peaceful outcome.
If we’re being fairly demanding as quest designers, and set aside the choices and divergent outcomes offered at the branching story beats, this is a fairly plain structure. It needs the writer and narrative designer to work very well together on those beats: break the script down into the purpose driving the quest, the characters’ intentions, and the situations that could arise from player behavior, then reflect those things in what follows.
But when all the weight goes onto the story beats and their branches, environmental storytelling in the combat spaces can end up rather thin. You can see this problem in some of Phantom Liberty‘s side quests.
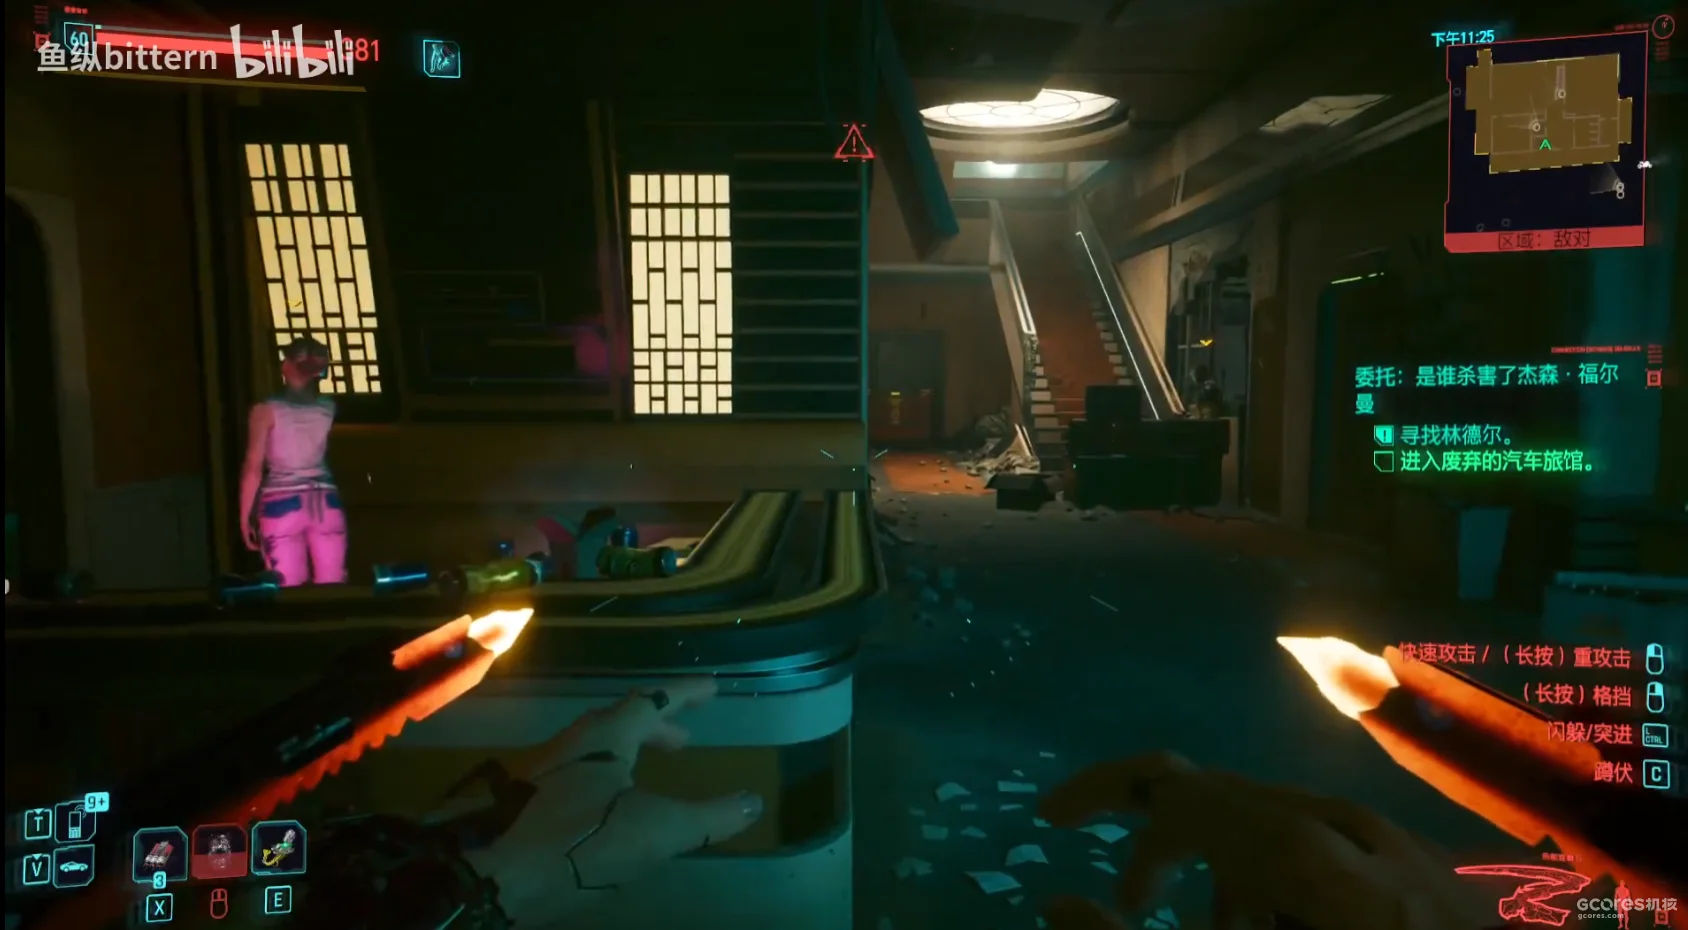
The objective text directs the player to find Rinder inside the abandoned motel.
In “The Man Who Killed Jason Foreman,” for example, the Scav-occupied hotel is a combat space. Apart from a few Barghest objects belonging to the target, Rinder, which the script specifically requires, its environment mainly serves to establish the Scavs. As you fight through it, it’s difficult to understand why a Barghest member like Rinder has anything to do with them.
Only at the end, after you beat the boss and speak to Rinder, do you learn why the Scavs have him. He got sick, sold his cyberware, got scammed, and ended up in their hands. That’s it.
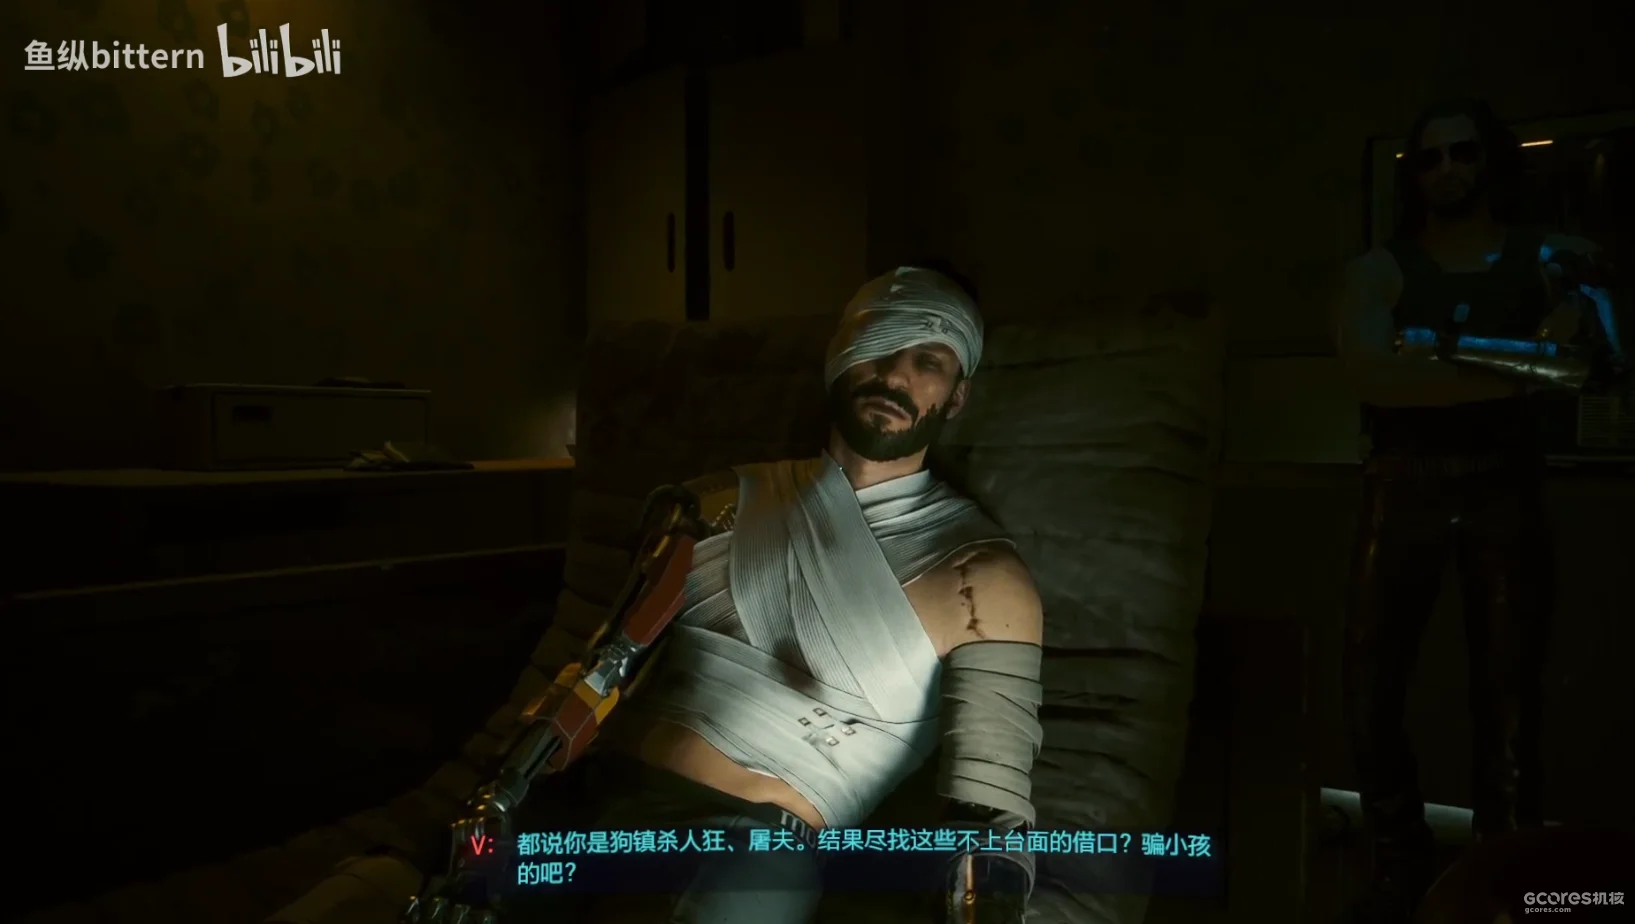
V’s subtitle questions how someone described as Dogtown’s butcher can offer such pathetic excuses: who does he think he’s fooling?
Of course, Phantom Liberty is relatively small beside the base game, and the staffing cost it requires isn’t as high. Even with this structure, dialogue and branching choices can still bring the quest to a satisfying close. And for all you V-the-Destroyers out there, if the environment doesn’t have much going on dynamically, focusing on the fight in front of you and enjoying the quest as it unfolds may be perfectly acceptable.
It’s just that, whenever you reach the end of a gig, you can rather predictably put away your murder weapon, listen to an NPC tell their life story, and then decide their fate with a dialogue option. Or with the weapon you just put away.
Breaking down the Black Sapphire sequence
For a more interesting combination of narrative performance and quest design, look at what happens after you enter the party at the Black Sapphire.
The purpose of this sequence is simple: ask around at the reception for Songbird, meet her, then perform biometric scans of the hacker twins.
Let’s sketch out its emotional rhythm.
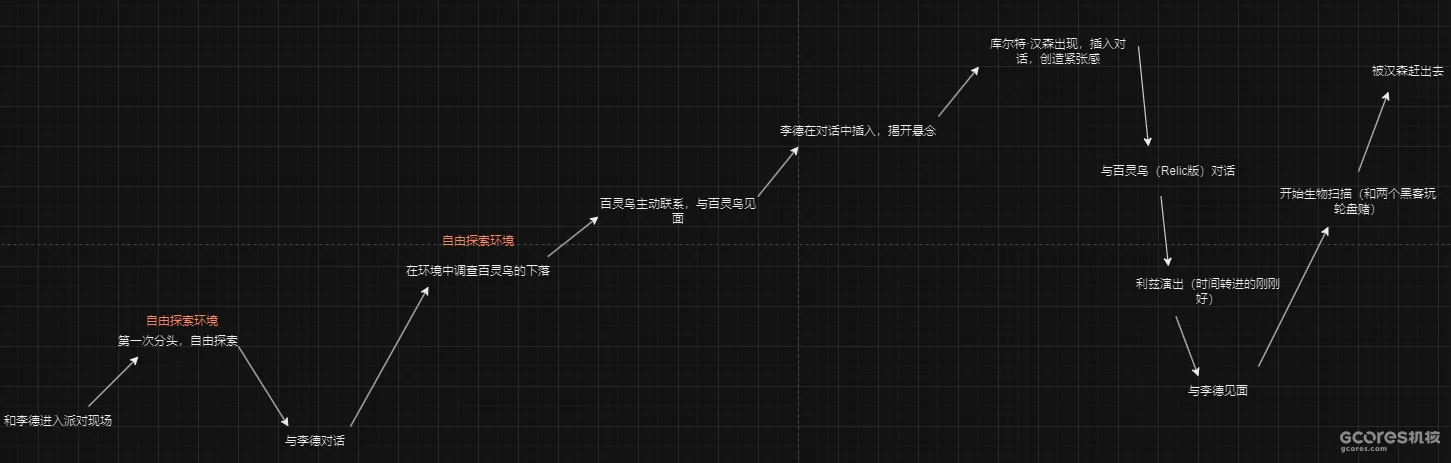
The emotional curve, in sequence:
- Enter the party with Reed → split up for the first time and explore freely → talk to Reed.
- Investigate Songbird’s whereabouts while exploring → Songbird contacts you and you meet → Reed cuts into the conversation, creating suspense → Kurt Hansen appears and joins in, creating tension.
- Talk to Songbird through the Relic → Lizzy’s performance, with just the right transition in timing → meet Reed.
- Begin the biometric scans by playing roulette with the two hackers → get thrown out by Hansen.
In terms of the sequence, conversations that ought to lower emotional intensity instead raise it: particular characters enter and trigger particular events. The result is tension without a fight or a challenge breaking out.
In the party’s map layout, Kurt Hansen has deliberately been placed in the corner to the right of the entrance.
The celebrities around the room show a very clear “class difference.” Approach someone who is comparatively harmless within the fiction, and you trigger a conversation; sometimes the player can interact with them. Approach someone associated with gangs or other dangerous criminal forces, and a bodyguard always screens them from the direction you’re coming from. You can still get close enough to hear the conversation, but the NPCs carry on as if you aren’t there.
You can even squeeze through the gaps between bodyguards and obstructions and intrude into the space framed by the conversation. They won’t acknowledge you, but they won’t react against your presence either.
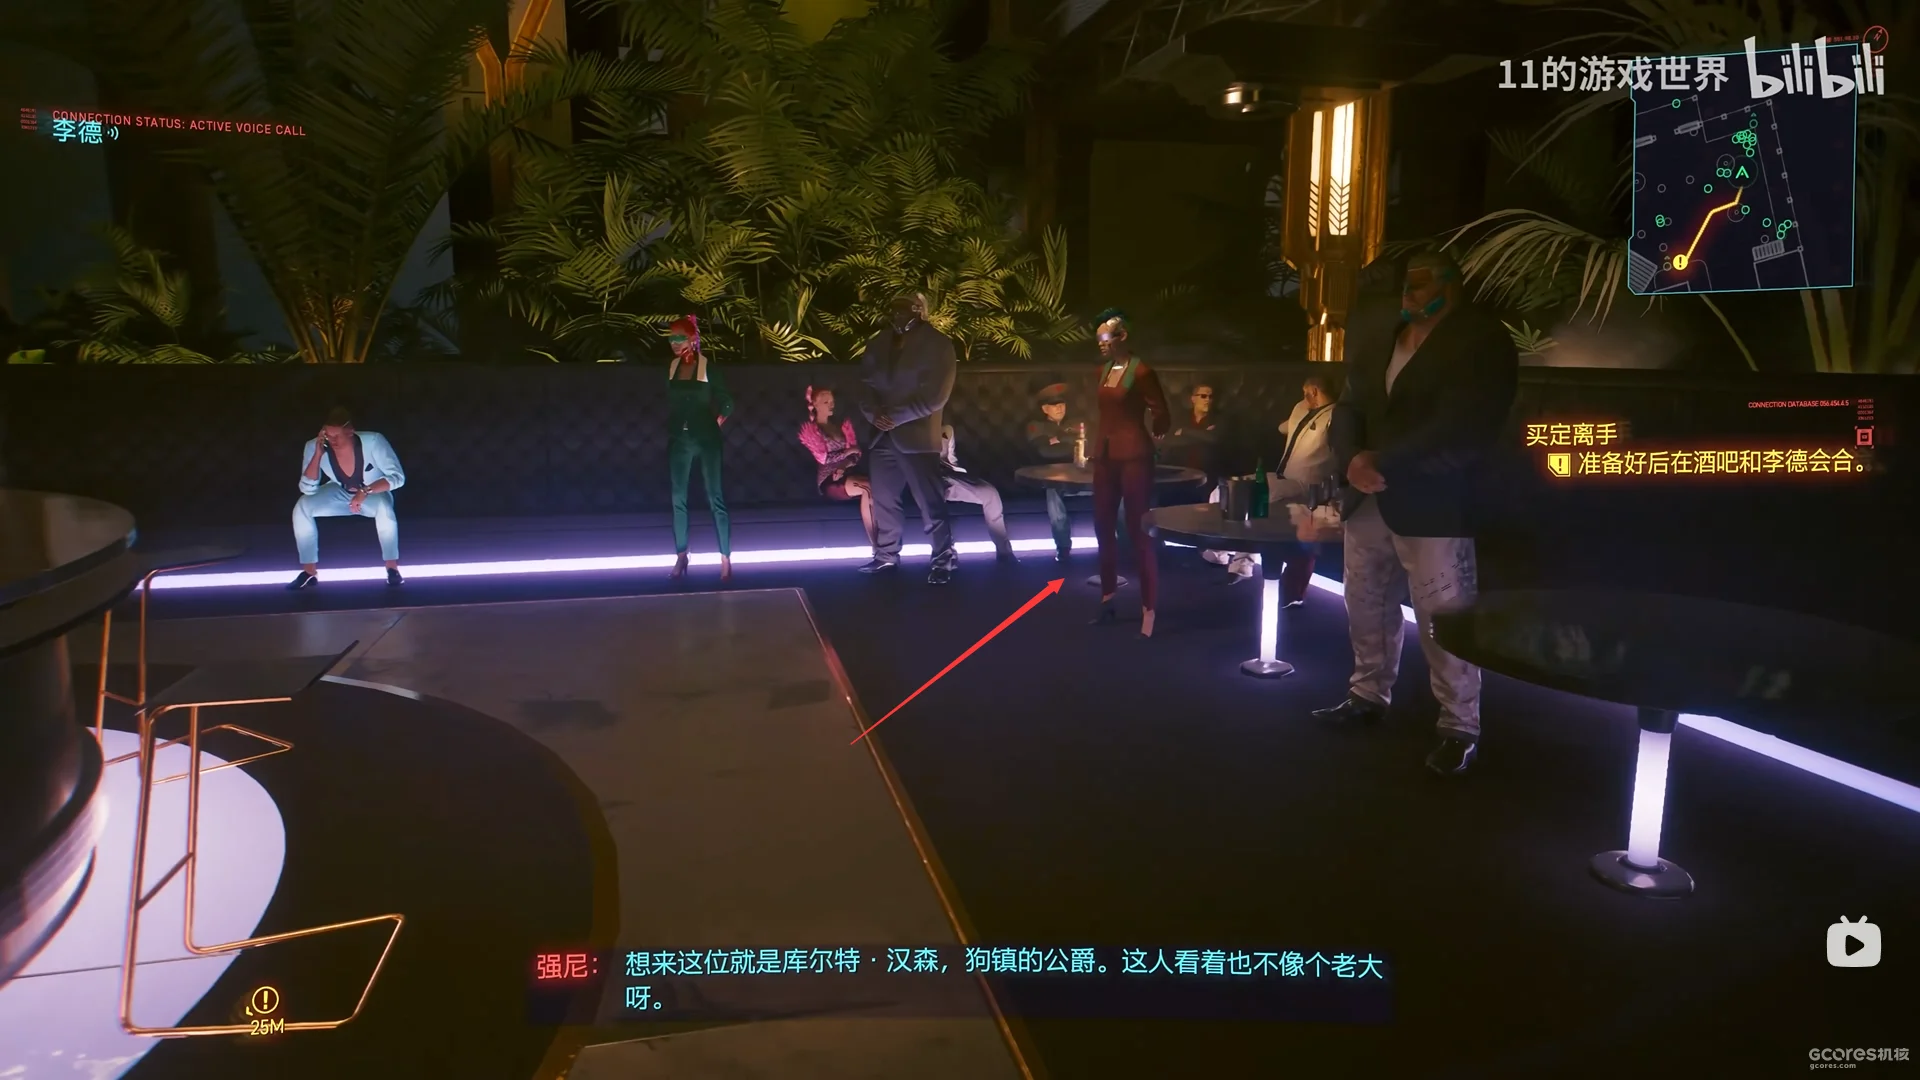
The arrow marks a gap in the arrangement of guests and guards. The objective asks the player to meet Reed at the bar when ready.
Hansen, Dogtown’s big boss, is different. Two unmistakable enemy units and a cordon mark his position. Get close, and his men verbally tell you to move along. The power relations in this room are expressed very directly.
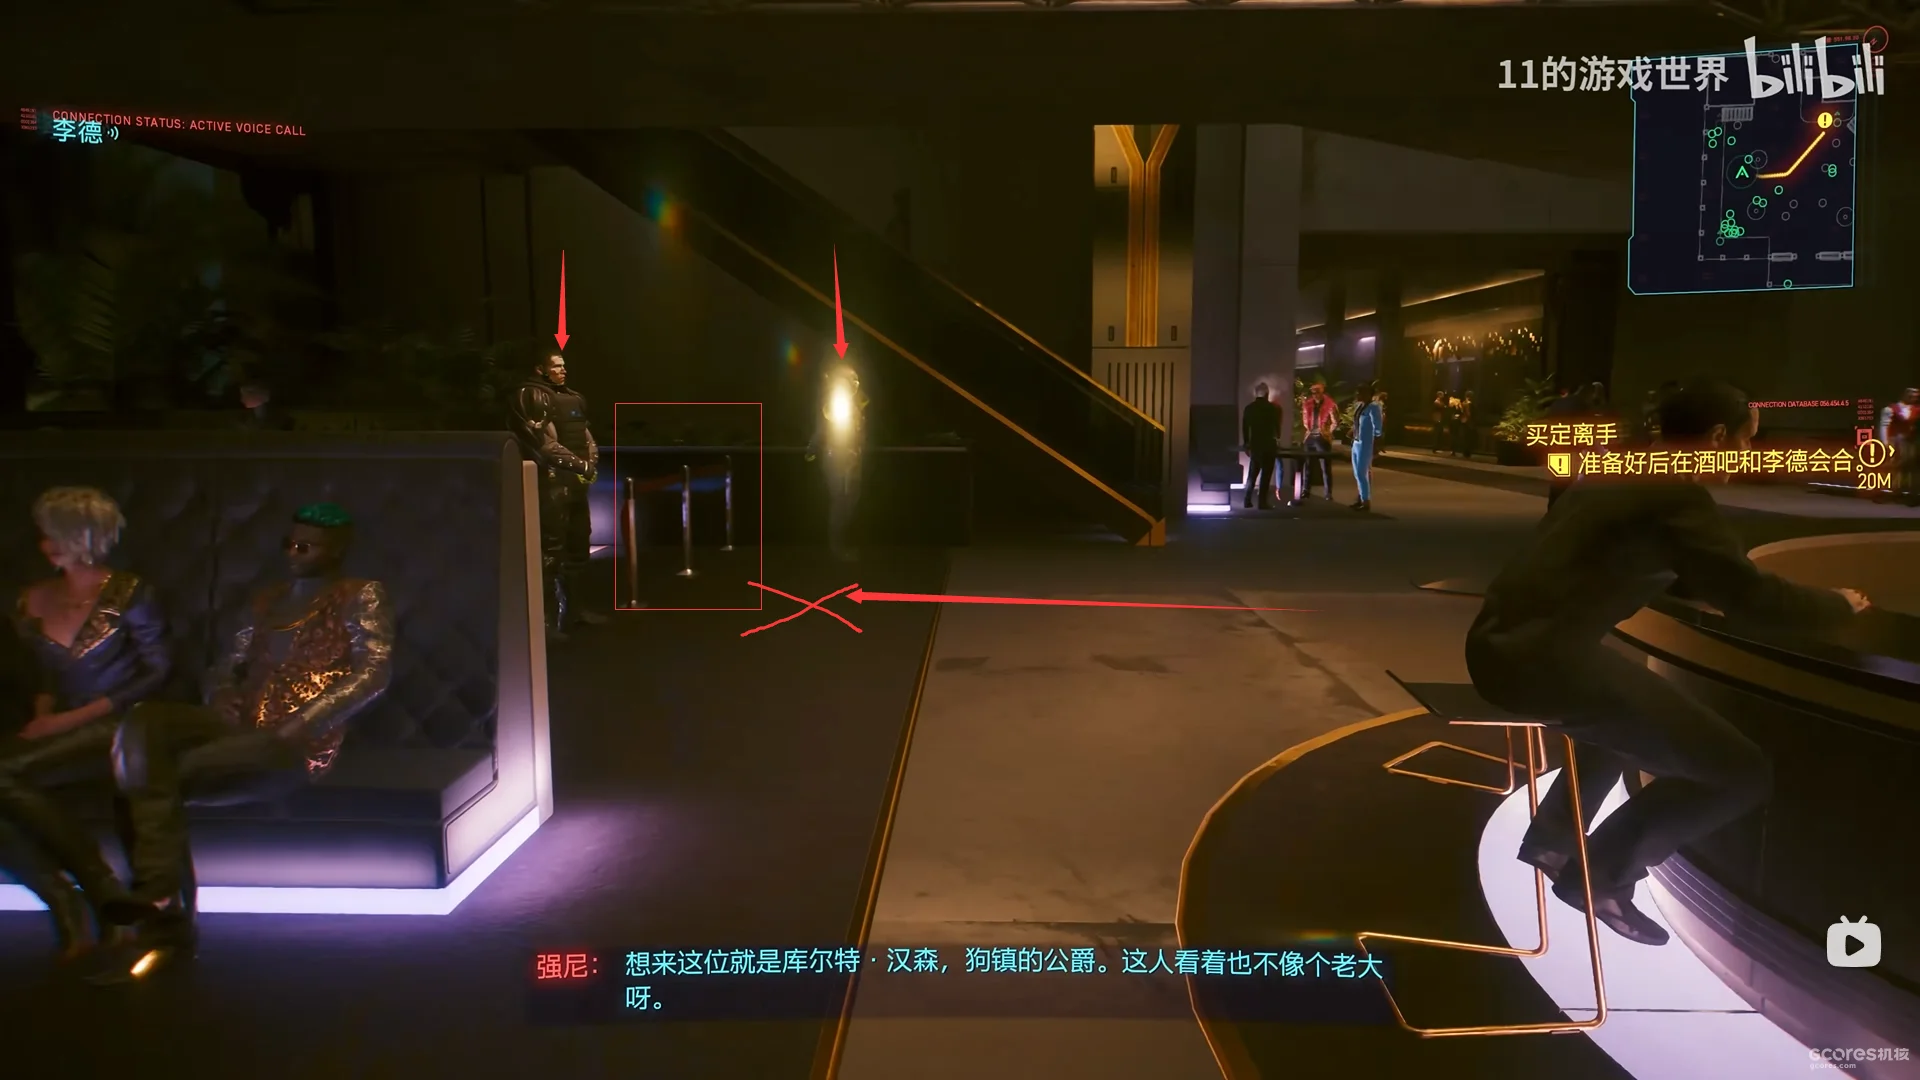
The arrows identify the two guards and the blocked approach. Johnny’s subtitle identifies Hansen as the “duke of Dogtown” and remarks that he doesn’t look like much of a boss.
Those power relations produce tension almost by themselves. The real tense sequence won’t begin until after your conversation with Songbird, but anyone who chooses to explore the room will naturally pick up this information and respond to it.
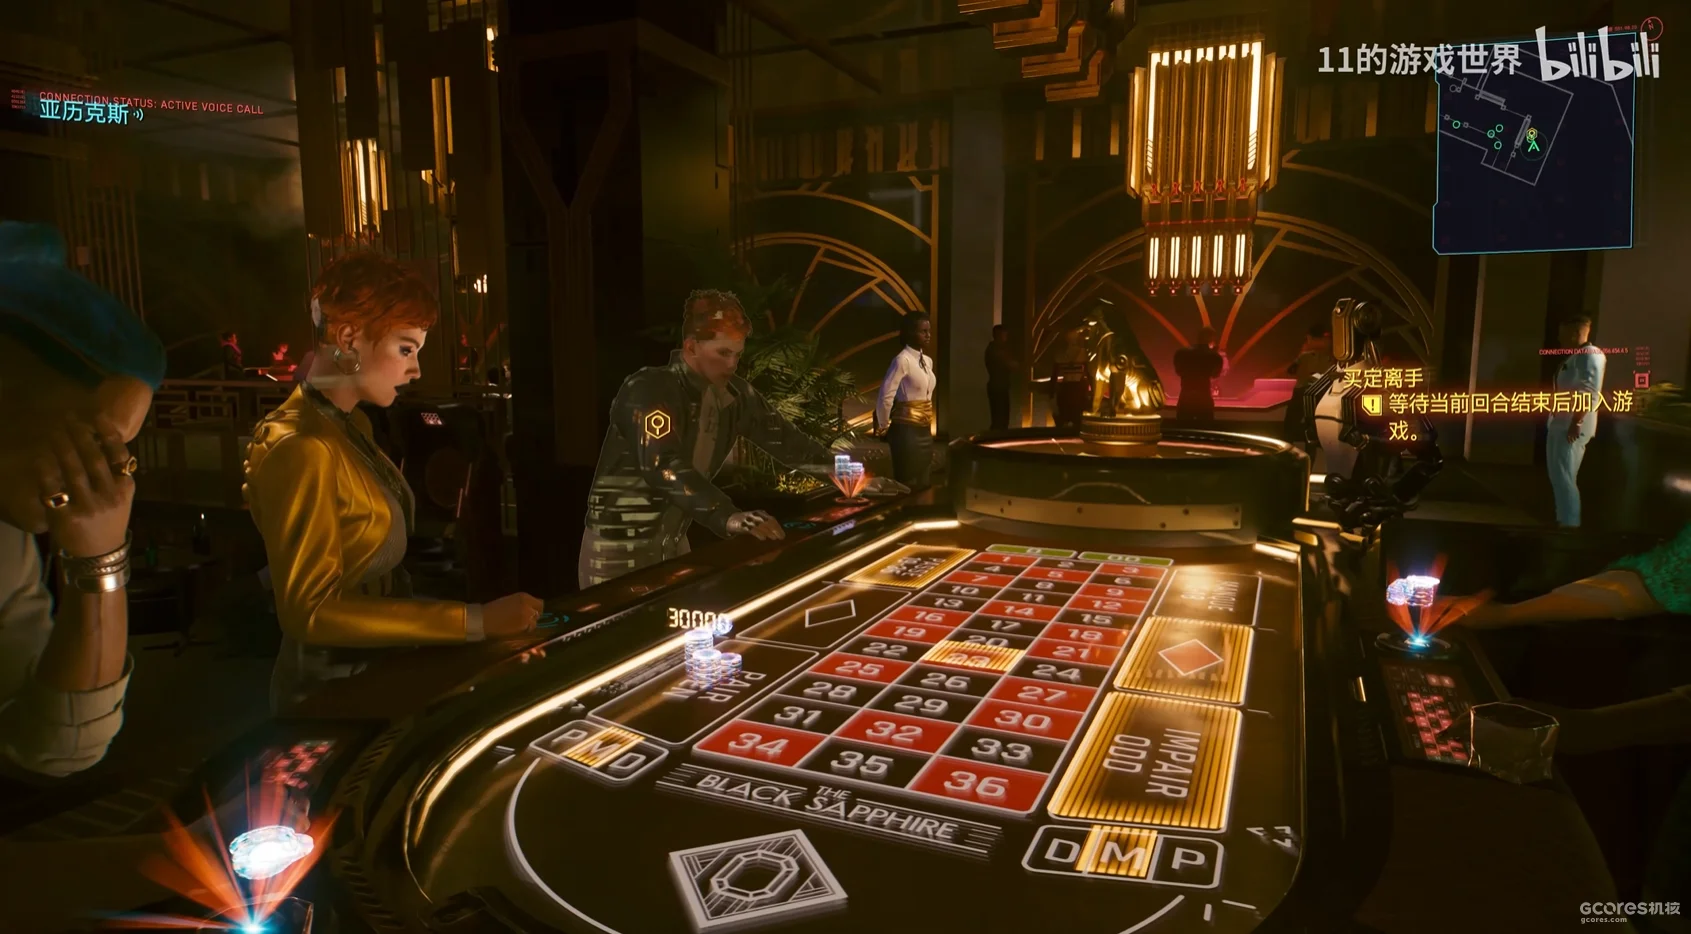
At the roulette table, the objective asks the player to wait until the current round ends before joining.
During the biometric-scanning sequence, the space around the table is relatively crowded before the player arrives. But the spot where you begin playing is also deliberately arranged to make you uneasy.
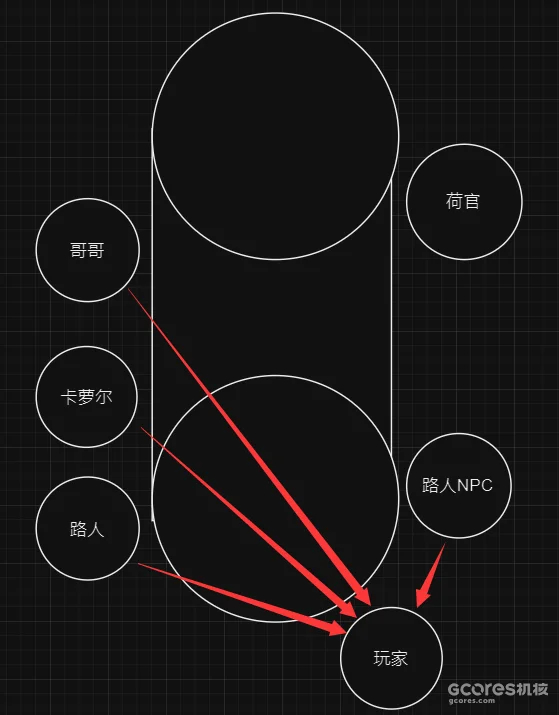
Top-down positions: the player is at the lower right of the table. On the opposite, left-hand edge, from nearest to farthest, are a bystander, Aurore, and her brother Aymeric. Another bystander stands on the right-hand edge, with the dealer farther up that side. The red arrows point toward the player.2
Let’s look at the staging of this roulette game. The player stands at the lower right of the table; the bystander, Aurore, and her brother are along its left side. Seen in depth from the player’s viewpoint, three NPCs can easily occupy the frame. Aurore is in the center, the bystander intrudes from the left, and her brother occupies the receding position on the right.
The bystander on the left has few lines and keeps staring at the player. The NPC on the right is more outgoing in conversation, which can create a sense of safety.
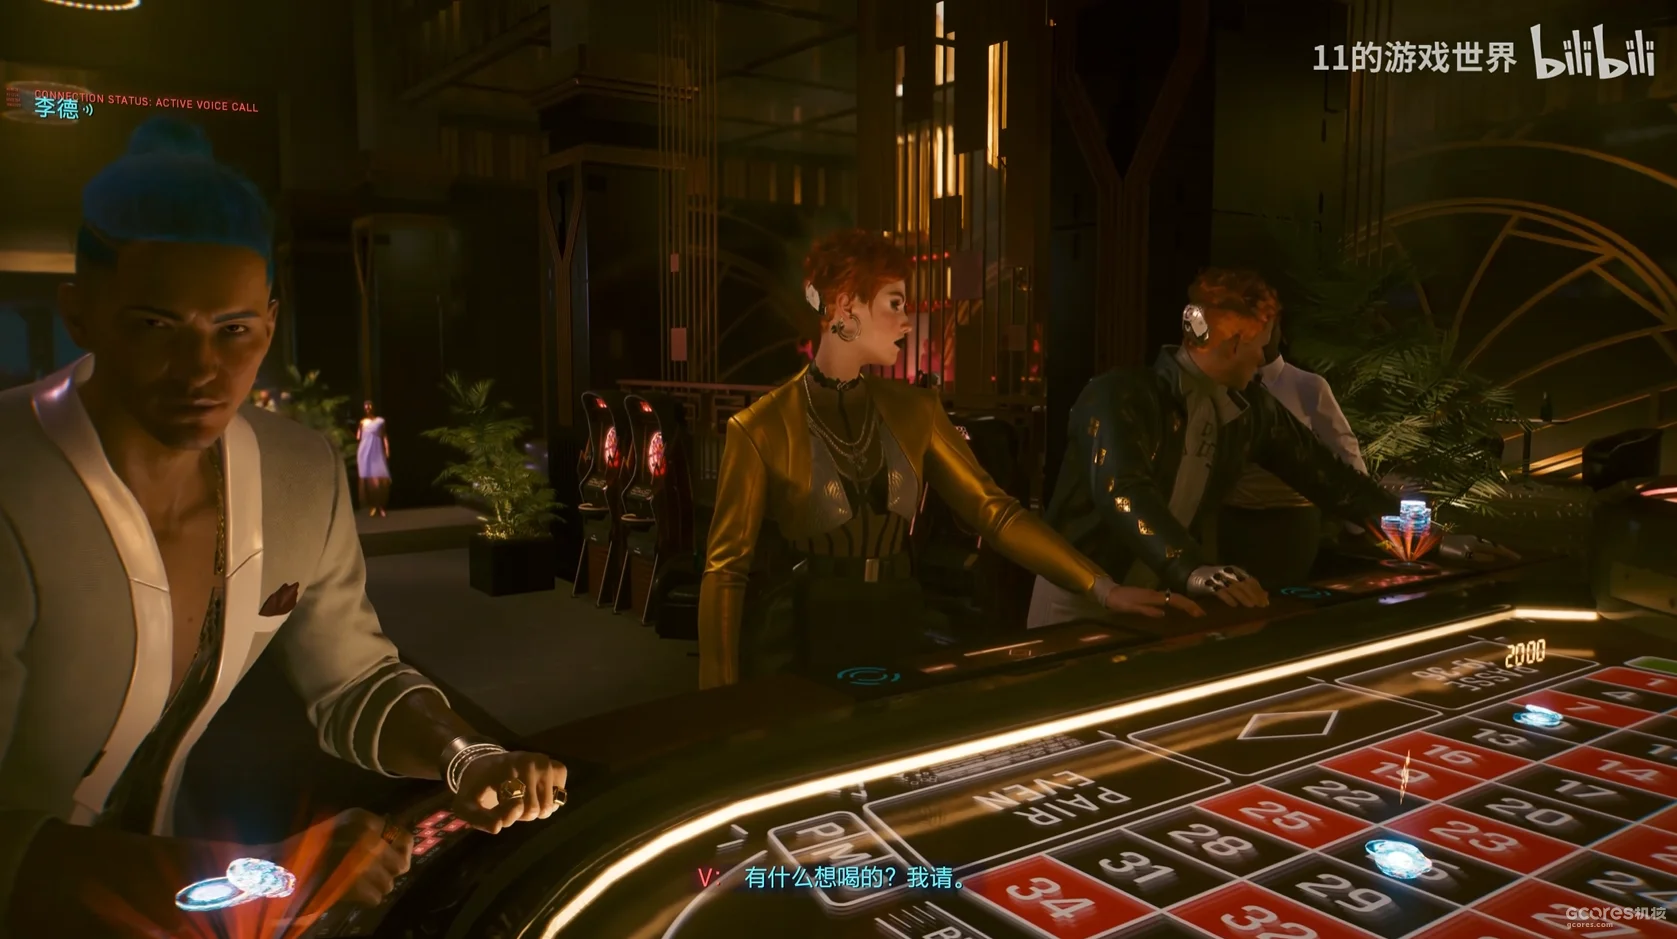
V offers to buy drinks. The bystander on the left looks directly at the player.
After the player waves for the bartender, the NPC first leaves the frame, then intrudes back into it from the left, watching the player as if keeping tabs on them.
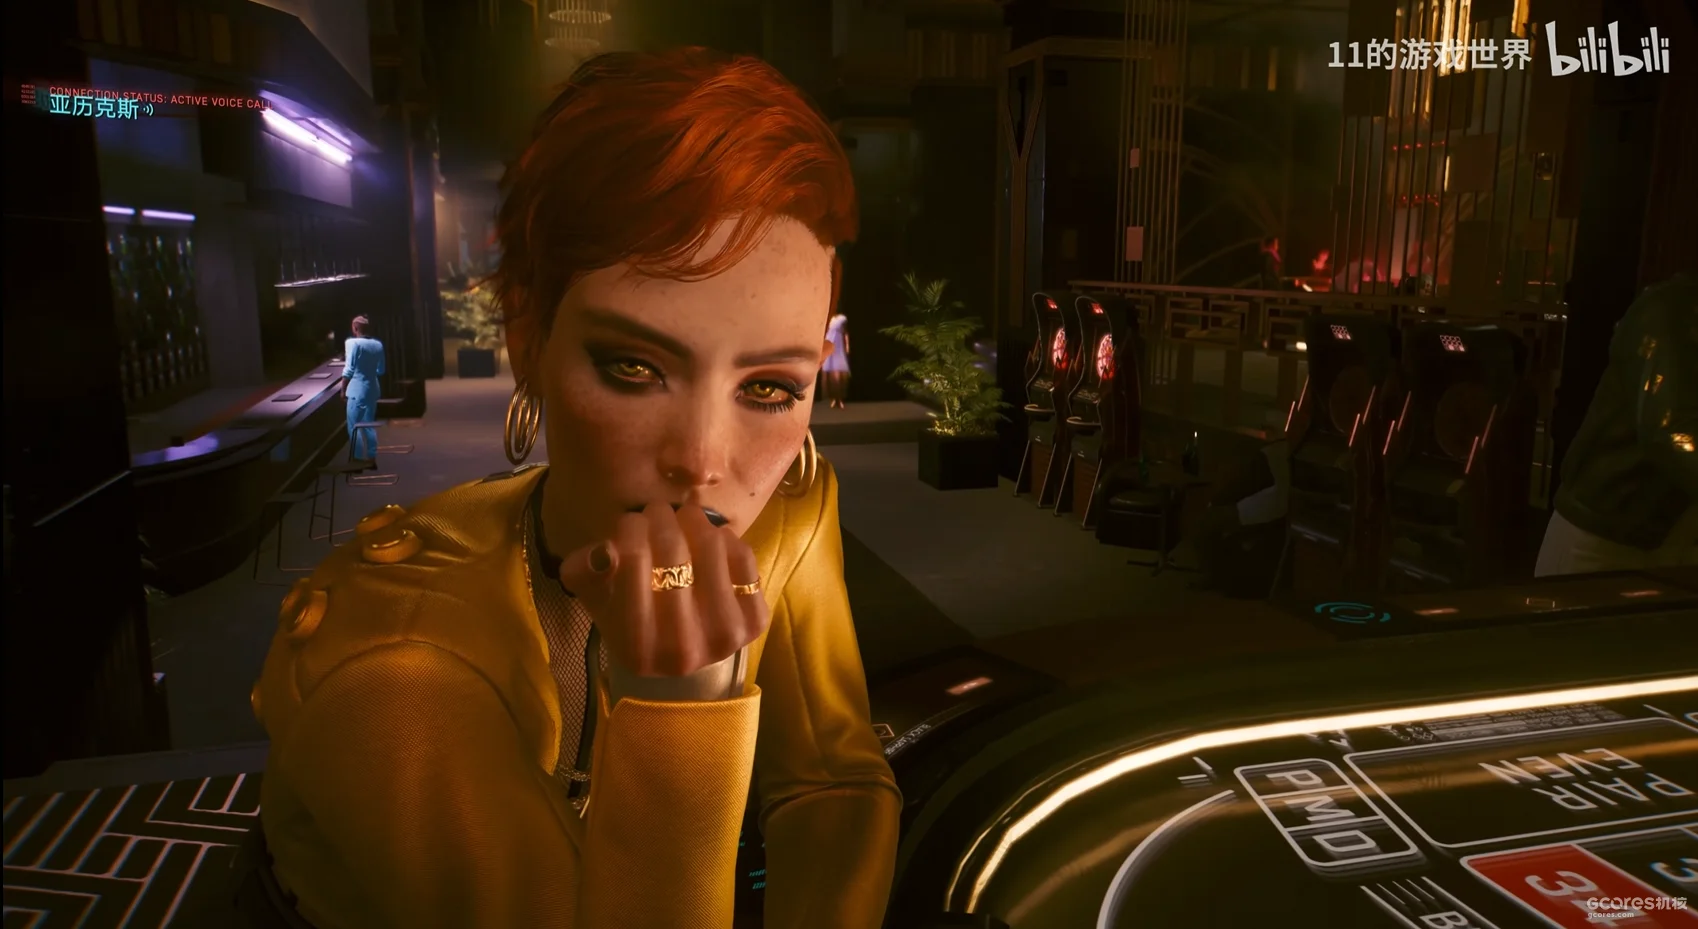
After a round of roulette, that NPC leaves. Aurore takes over the position that was making us uneasy. Now the unease transfers to her.
Meanwhile, Alex keeps reminding the player that Reed has gone off the grid.
Once Aurore finishes this intrusion, she returns to her place. After a losing bet, the NPC on the right leaves. The three people remaining at the table are now arranged as two against one.
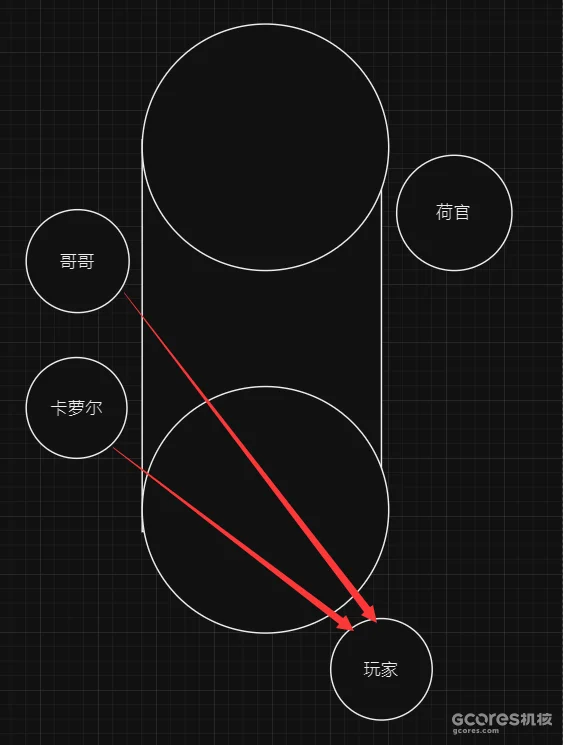
The two bystanders have left. The diagram now shows Aurore and her brother opposite the player, with the dealer still to one side; both red arrows converge on the player.
This is where the biometric-scanning gameplay begins. You need to manage the NPCs’ emotions through dialogue, provoking emotional responses to get the scans you need.
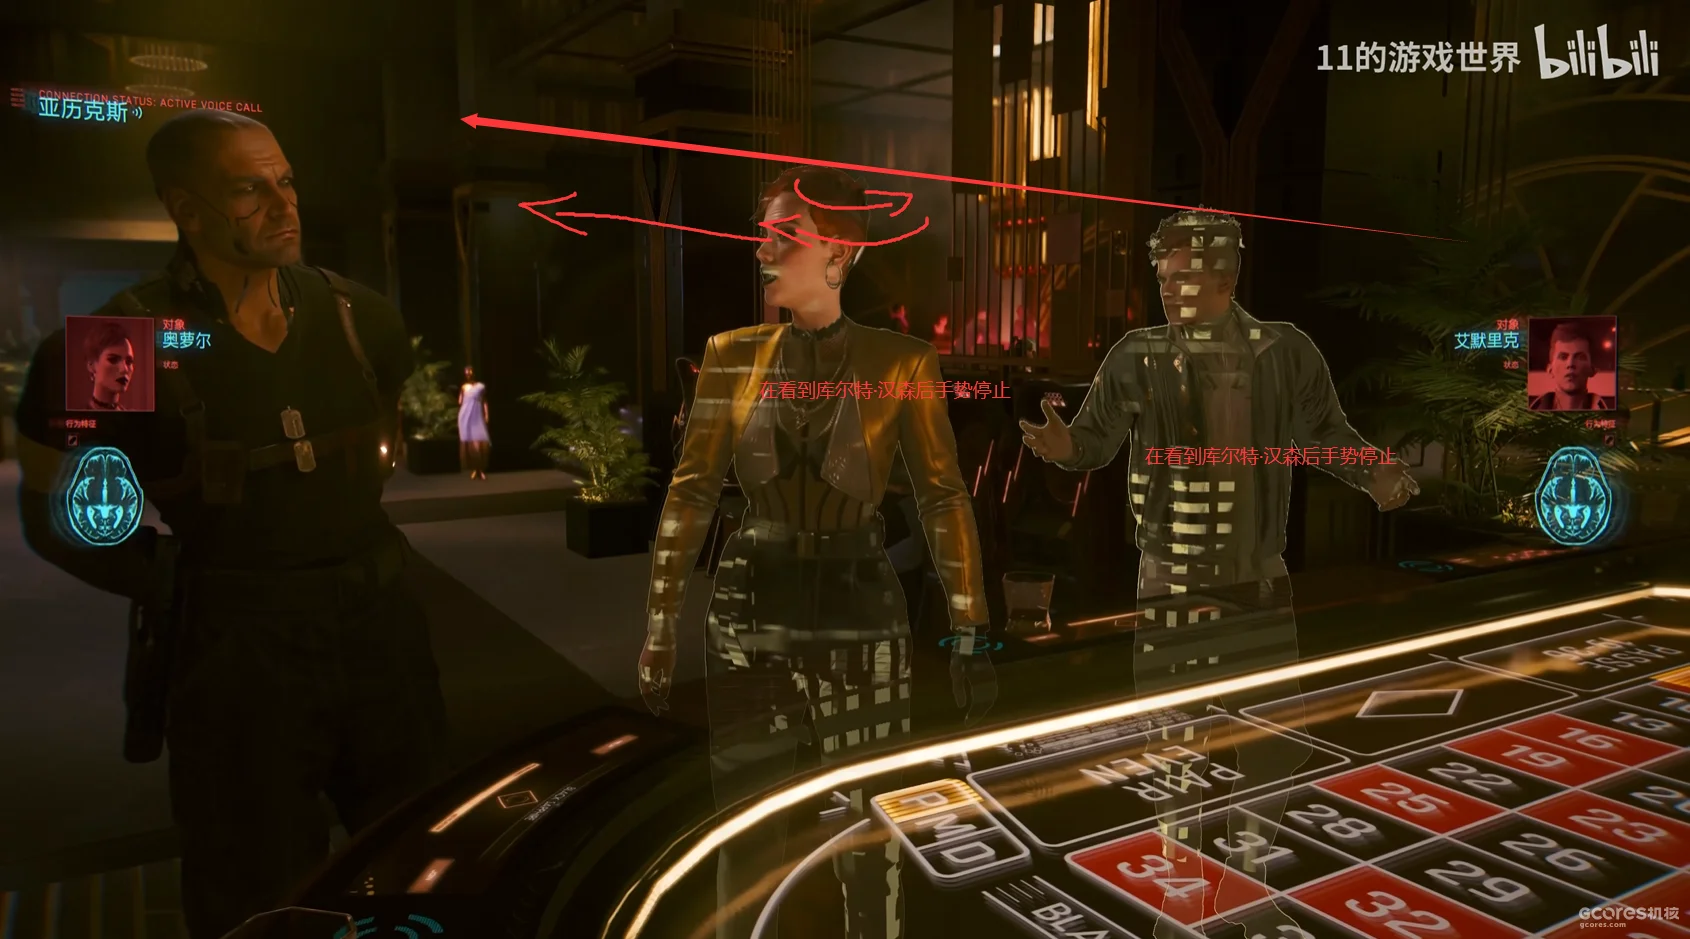
The annotations on both twins say that their gestures stop when they see Kurt Hansen. The arrows trace his movement into the left side of the frame.
When the scans are complete, Kurt Hansen enters from the right and stops on the left side of the player’s view: exactly where the oppressive NPC was standing earlier. Both hackers’ movements and expressions change. Their microexpressions suggest that they’re holding their emotions in check.
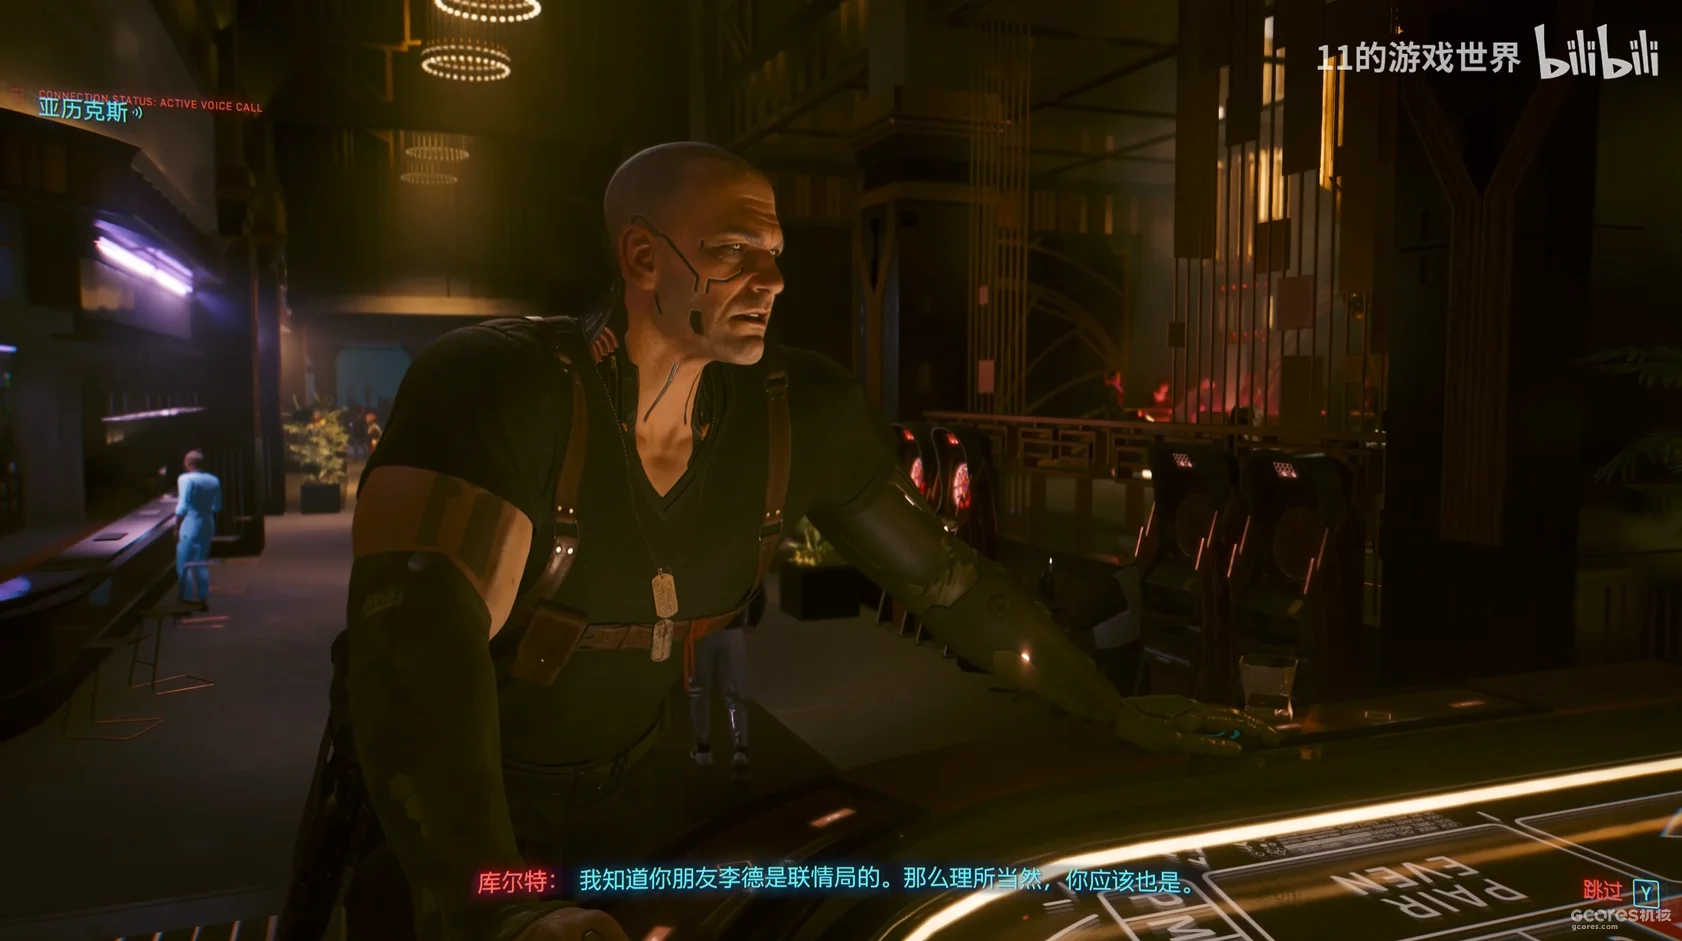
Hansen says he knows Reed is FIA, and assumes the player is too.
Then, from that same position, Hansen tells the player to leave.
Functionally, this sequence is there to leave a memory, so that later, when the player impersonates one of the twins, they can handle Hansen’s questioning. But the game never bluntly says, “Remember their traits and personal details.” It uses this high-pressure, rather Casino Royale-like situation to make an impression. It really does help the player remember what happened, giving the DLC a particularly strong moment to look back on.
Path 3: Theme, and a little personal rambling
The central conflict of Phantom Liberty, or at least what the player feels most strongly as they move through it, is choice.
Whether it’s the options offered along a quest or the choice of an ending, the game keeps reinforcing choice and the risks that come with it.
In a tense, oppressive environment, players naturally perceive risk in their choices. That perception then affects what they decide to do.
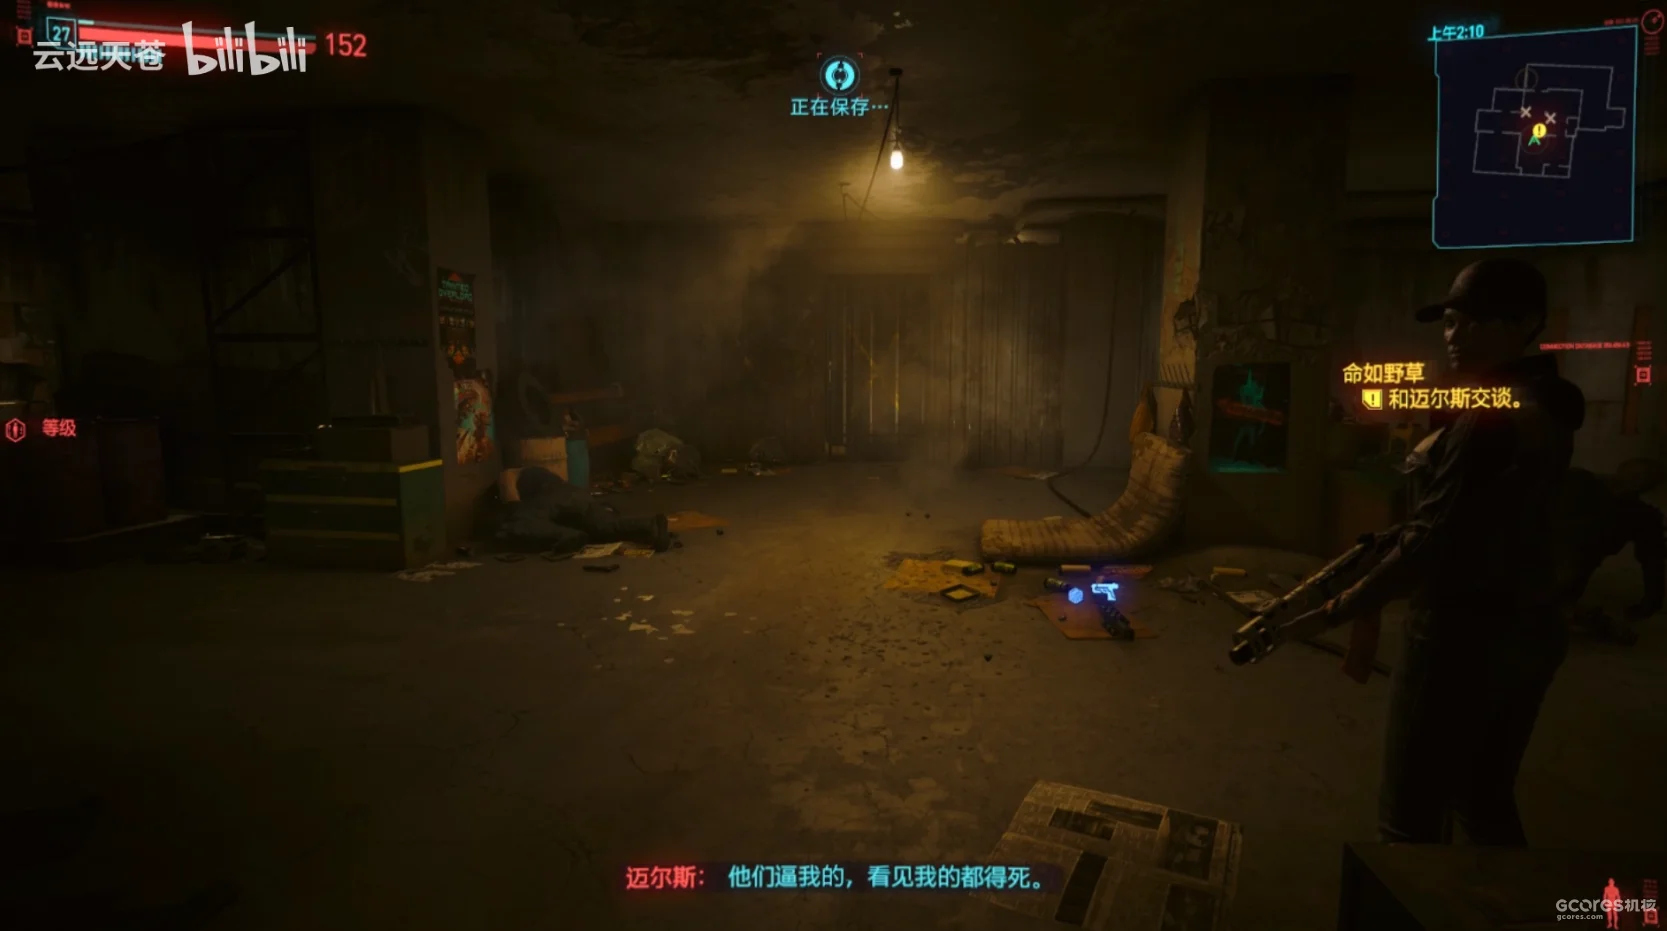
Myers, in the safehouse: “They forced my hand. Anyone who saw me had to die.”
Across the overall sequence, we can see the stretch from first meeting Reed to reuniting with Songbird as a period of working with Reed, coming to understand him, and developing a sense of mission. Once you’ve made contact with Songbird, her scenes interspersed through the quests work more like interruptions. They present a trolley problem: are we really going to hand her over to the NUSA?
Honestly, in terms of quest difficulty, choosing Reed in “Firestarter,” then going through “Black Steel in the Hour of Chaos” and “Somewhat Damaged,” is clearly easier than helping Songbird, heading to the spaceport, and then deciding her fate. The choice the game offers in “Firestarter” isn’t a fair one. And the reason it is designed that way is that, before you get there, Songbird has already stressed her desire to choose freedom.
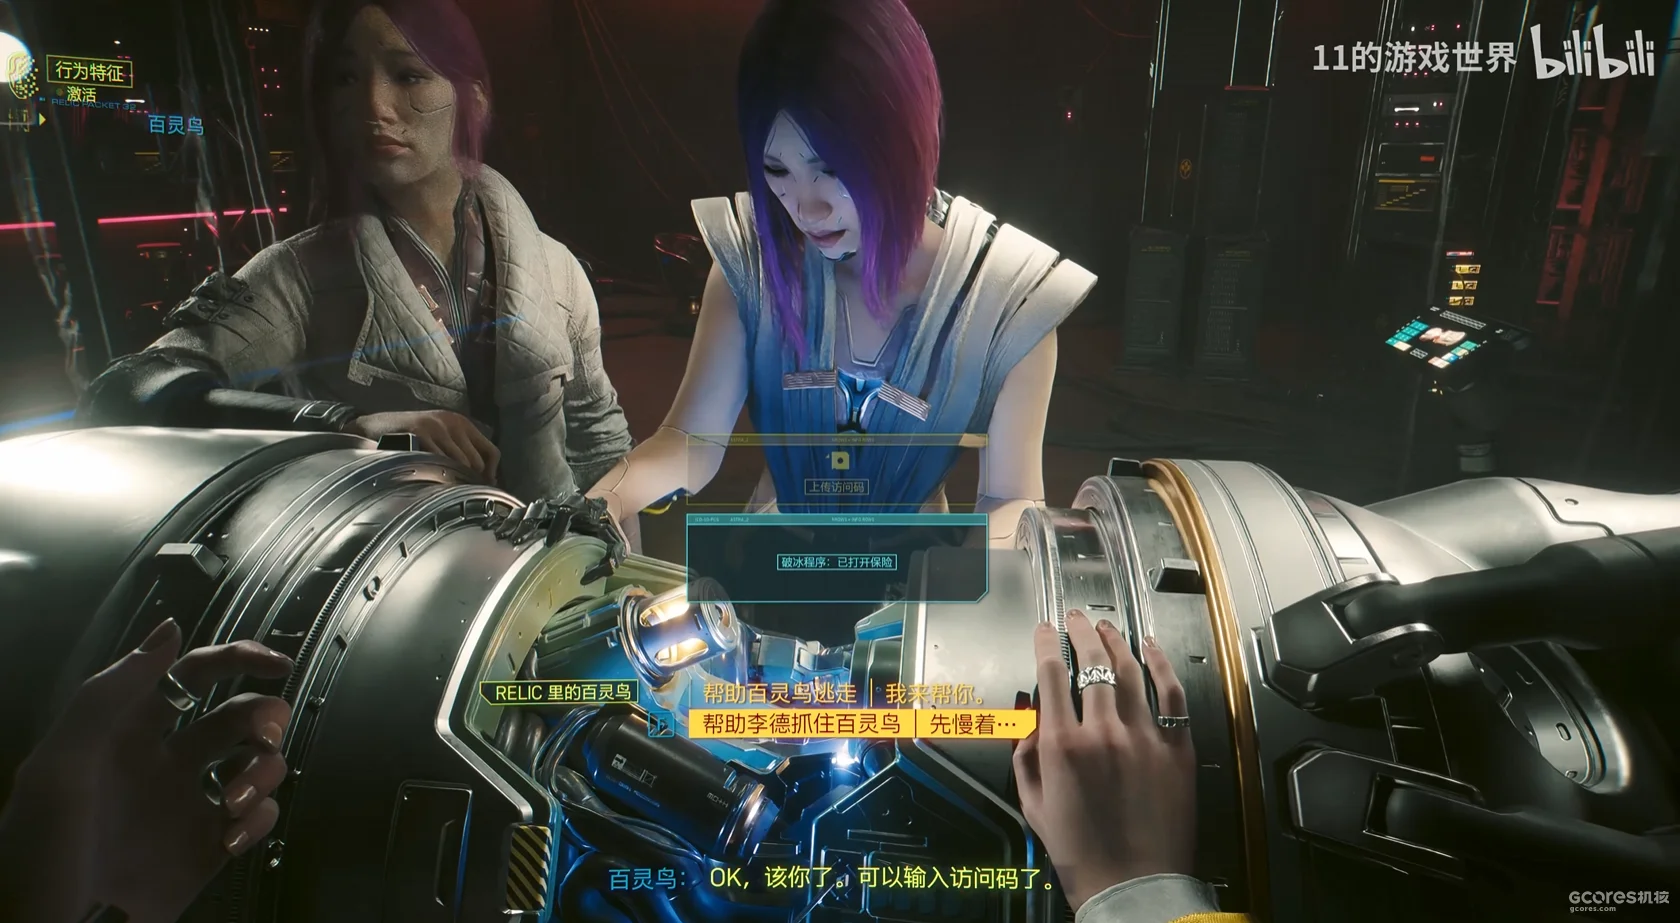
The two choices shown are to help Songbird escape, or to help Reed capture her. Songbird prompts V to enter the access code.
Perhaps this is a drawback of the DLC’s scale. It isn’t a huge game in its own right, and the quest designers show a preference here: trust Reed and you will be swallowed up; trust Songbird and you will find freedom. But they haven’t done enough groundwork for the option they favor. Instead, they punish the one they don’t like. Even judged as a spy thriller, that isn’t a particularly sound design.
Look at the sequence in “Firestarter.” The player has impersonated a hacker and passed the questioning. Your companion is upstairs keeping Hansen under control, and Reed is almost in position. Then, at precisely this point, up pops a choice between helping Songbird and helping Reed. The timing seems wrong.
But perhaps, as an expansion, 2077’s DLC simply didn’t have enough time to build up the emotional groundwork that both options needed. It communicates the theme of choice very well, yet in designing the consequences of those two choices, the designers still steer us toward one side. That isn’t the same as having an “official ending.” It looks more like the contradiction of “we didn’t have enough person-days, so some regrets would have to remain.”
Perhaps, in that final stretch of the Tower ending, the CDPR that made 2077 is a little like V: become a legend, then leave with regrets.
The original chart calls the celebration “Easter.” The official Bond site identifies the opening as Mexico City’s Day of the Dead festivities. The sequence above otherwise retains the author’s chart.↩
The Chinese text and diagrams vary between “Carol,” “older brother,” “younger brother,” and “twin sisters.” The screenshots identify Aurore and Aymeric. This translation uses Aurore and “her brother,” or “the twins,” while retaining the positions and behavior being analyzed. The original diagrams remain alongside the translation.↩